Shooting method with fixed shooting magnification
Shooting magnification setting
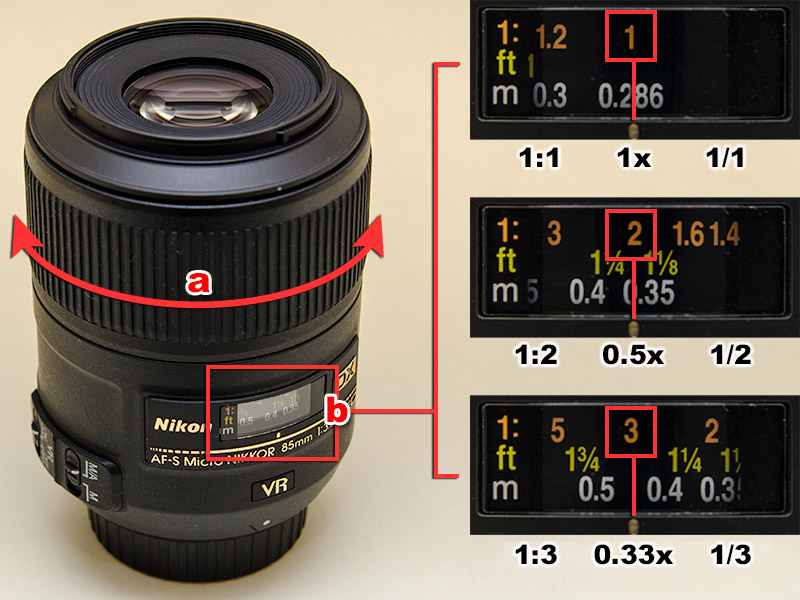
Intraoral photographs are taken using two magnifications, 1/2 and 1/3, but only the 1/3 magnification is used for the 5-image method.
To set the shooting magnification, turn the focus ring (focusing ring) (a) on the lens barrel as shown in Photo 9, and adjust the number displayed on the scale in (b) to the guide. When set to 1/2 magnification, set “2“, and for 1/3 magnification, set “3“.
Adjust the shooting distance to focus
When fixing the shooting magnification, it is normally necessary to set the focusing manually (M). The reason is that if you do it manually, you can get the shooting magnification more accurately.
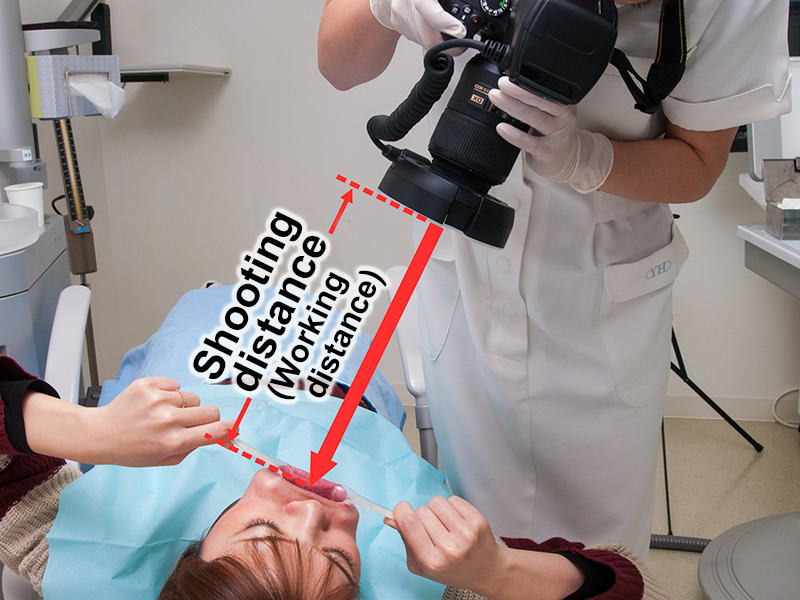
Therefore, when it comes time to shoot, the focus is adjusted by the distance between the front lens of the camera and the subject (this is called the working distance) after determining the shooting magnification by the method shown in Photo 9. The photographer himself moves back and forth to adjust Photo 10). When it is in focus, press the shutter to shoot.
If you find it difficult to focus
If you are not accustomed to shooting with manual focus, you tend to take out-of-focus photos. Also, in actual clinical practice, focusing accuracy and quickness are required rather than accuracy of imaging magnification, so here we will introduce a special imaging method that uses both autofocus and manual focus. Using this method will cause some errors in the shooting magnification, but there is a good chance that you can eliminate out-of-focus photos.
- Set the focus mode to “M / A” (Photo 7)
- Set the shooting magnification with the focus ring (Photo 9)
- Adjust the shooting distance by moving it back and forth (Photo 10)
- Shoot with focus lock
The final “focus lock” is to lock the focus position by pressing the shutter button halfway in the autofocus mode. If you press the shutter button all the way down, you can shoot with a fixed focus position.
Focus lock
is used to change the composition while keeping the focus position fixed.
The reason why you need to use focus lock is that you can eliminate the drawbacks of autofocus.
The autofocus function is often adjusted to focus on the central part of the viewfinder, so when shooting an occlusal view, the tongue and palate will be in focus and the teeth will be out of focus.
Focus lock is used to solve these problems. Place the part you want to focus on in the center of the viewfinder, press the shutter button halfway to lock the focus, move to the correct composition, and then press the shutter button all the way to shoot.
In this case, the focus point (the part that comes into focus in the viewfinder. It lights up in red when the focus is locked in Photo 11) is fixed to the center. The focus point should be fixed in the center by reading the camera manual.