<Part2 of 2>Table of contents
- Five-sheet method – Front view (front jaw) shooting method
- Five-sheet method – How to take an occlusal surface view (mandible)
- Five-sheet method – How to take an occlusal surface view (maxilla)
- Five-sheet method – How to shoot the left side view
- Five-sheet method – How to shoot the right side view
Five-sheet method – Front view (front jaw) shooting method
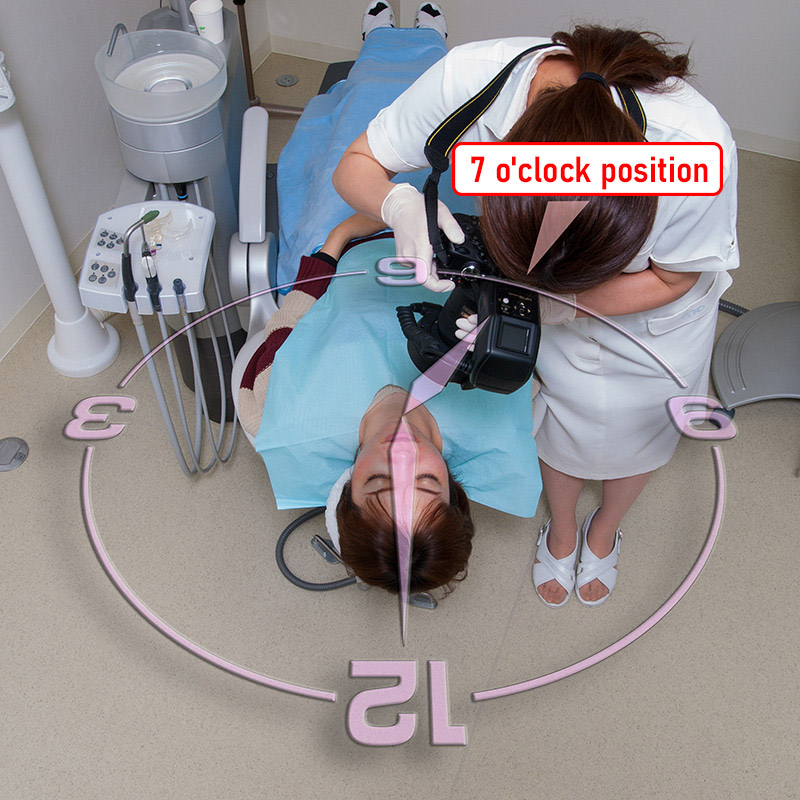
When shooting the “front view (front jaw)” of the five-sheet method, stand at the “7 o’clock” position when the patient’s head is at 12 o’clock. (Photo 1)
Moisten the inside of the cheek retractor
Before the actual imaging, slightly moisten the inner surface of the cheek retractor to make it easier for the cheek retractor to slide on the patient’s lips.
How to use the cheek retractor
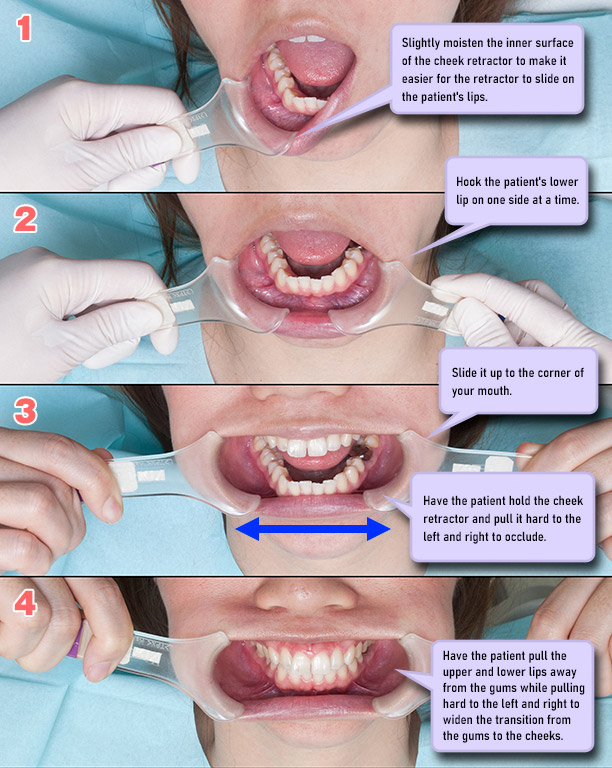
How to use the cheek retractor To place the cheek retractor in the patient’s mouth, follow the procedure shown in Photo 2.
First, hook the lower lip one side at a time, slide it up to the corner of the mouth, and then have the patient hold the retractor.
Have the patient pull the retractor strongly to the left and right to occlude, then pull the upper and lower lips away from the gingiva to widen the gingiva-cheek transition.
(Photo 2) Have the patient hold the cheek retractor and pull it strongly to the side while pulling the upper and lower lips away from the gingiva to widen the gingiva-cheek transition area.
Preparation of shooting magnification
Before starting the actual shooting, let’s set the focus mode of the lens and prepare the shooting magnification. For these settings, refer to “Camera and Flash Settings” and “Shooting Method with Fixed Magnification” in the Part 1/2.
If you can focus manually, skip the focusing and read it, and since the manual is difficult, I will explain it for those who use autofocus.
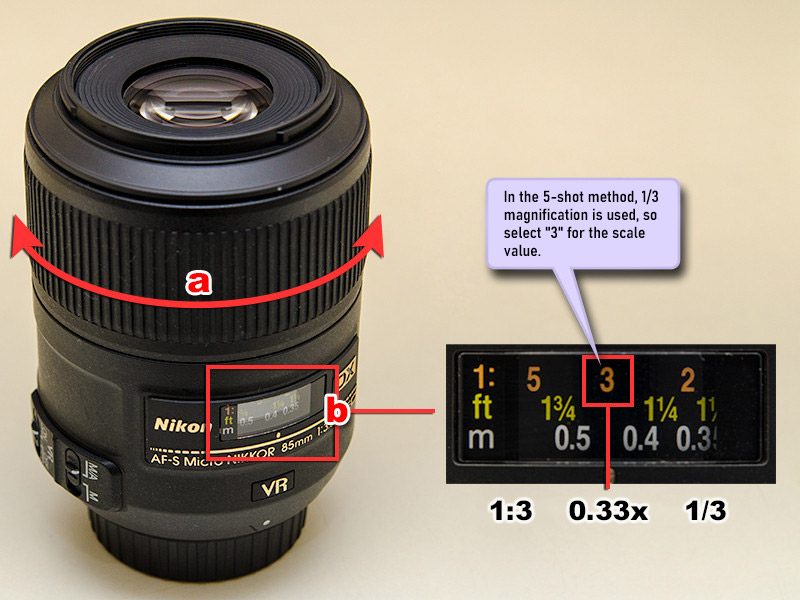
In the 5-shot method, 1/3 magnification is used, so select “3” for the scale value of the focus ring.
However, if you use autofocus, the camera will move the focus ring, so the magnification setting will have some error.
Even so, focus is the most important aspect of intraoral photography.
You need to be willing to accept a slight magnification error.
(Photo 3) Use a magnification of 1:3 for 5-sheet shooting.
Set the number on the lens scale to “3”.
Cooperation with patients
When shooting from the front or with the front jaw, stand at 7 o’clock. In this position, when the patient is facing straight up, the posture tends to cover the patient.
This not only makes the photographer’s posture unstable, but also gives the patient a feeling of oppression.
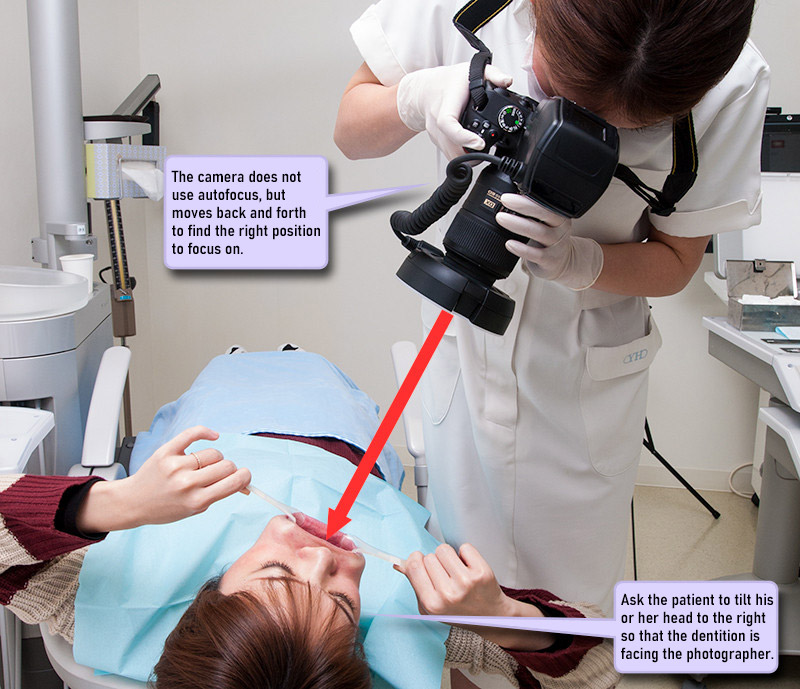
Therefore, ask the patient to cooperate and turn his face directly in front of the camera as shown in Photo 4.
(Photo 4) Correct intraoral photography requires cooperation such as having the patient hold a cheek retractor on the mouth and turning his face toward the camera.
First, move your body back and forth to adjust the focus.
Here, we introduce focusing using autofocus, but in order to minimize the error in shooting magnification mentioned above, the initial focus movement is focused using the body.
After taking the posture shown in Photo 4, move your upper body back and forth along the optical axis of the camera to find the position where you can focus.
Position to focus
After focusing roughly by moving your body back and forth, it’s finally time to shoot with autofocus.
Autofocus uses the center focus point displayed in the viewfinder. (Refer to the shooting method with a fixed shooting magnification in the first part.)
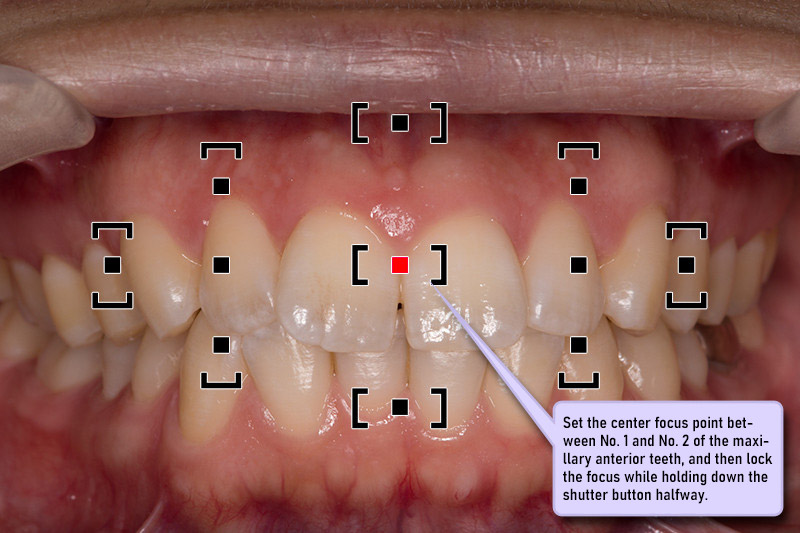
As shown in Photo 5, set the center focus point between No. 1 and No. 2 of the maxillary anterior teeth, and then lock the focus while holding down the shutter button halfway. (Photo 5)
Make the composition correct
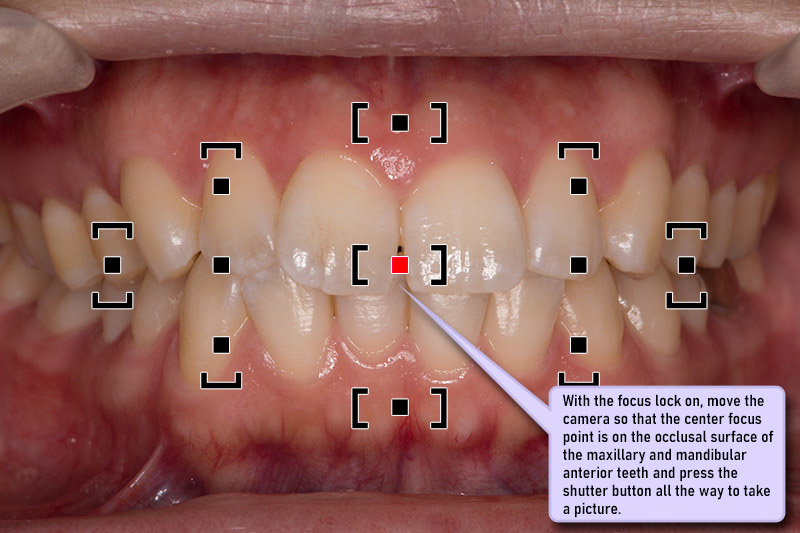
With the focus lock on, move the camera to recompose so that the center focus point is on the occlusal surface of the maxillary anterior and mandibular anterior teeth. (Photo 6)Once you have the correct composition, press the shutter button all the way to take a picture.
*Points for composition
With the focus lock on, move the camera to recompose so that the center focus point is on the occlusal surface of the maxillary anterior and mandibular anterior teeth. (Photo 6)
Once you have the correct composition, press the shutter button all the way to take a picture.