Five-sheet method – How to take an occlusal view (mandible)
Front view / Standing position when shooting
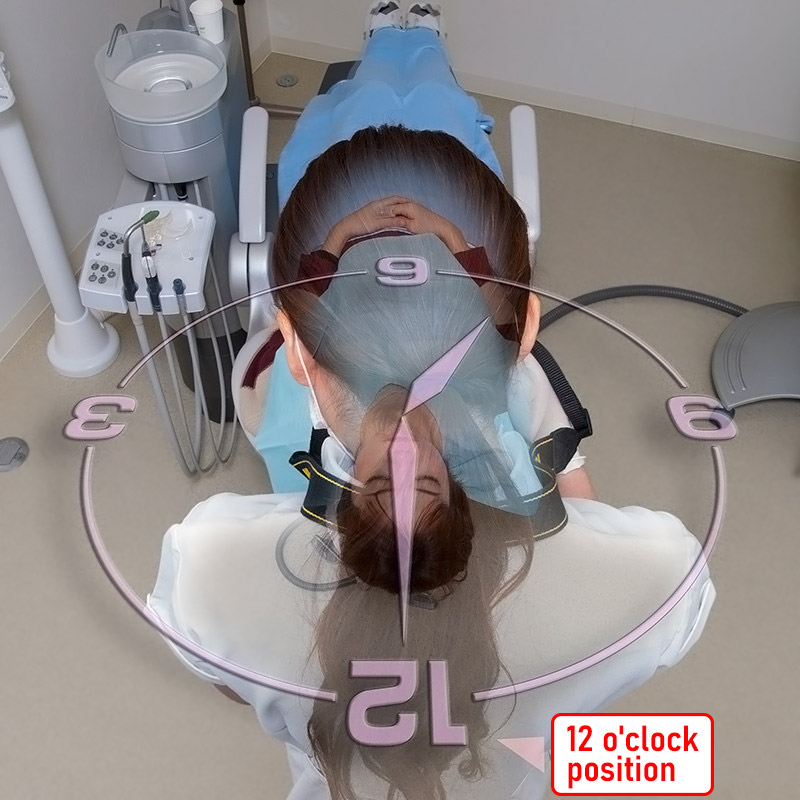
When taking a picture of the “occlusal surface view (mandible)” of the five-sheet method, stand at the “7 o’clock” position when the patient’s head is at 12 o’clock (Photo 7).
Mirror to use
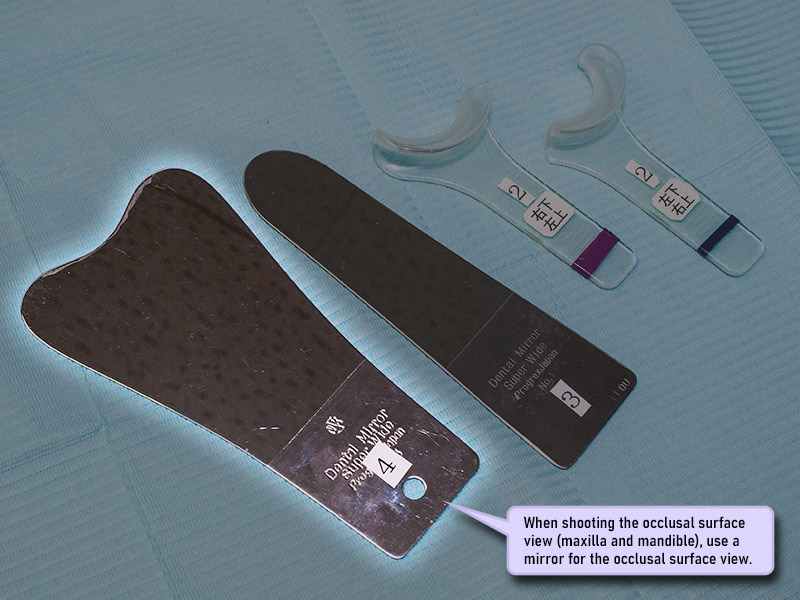
When shooting the occlusal surface view (mandible), use a mirror for the occlusal surface view.
Warm the mirror in advance so that it does not fog when inserted into the oral cavity. (Photo 8)
Position of cheek retractor and insertion of mirror
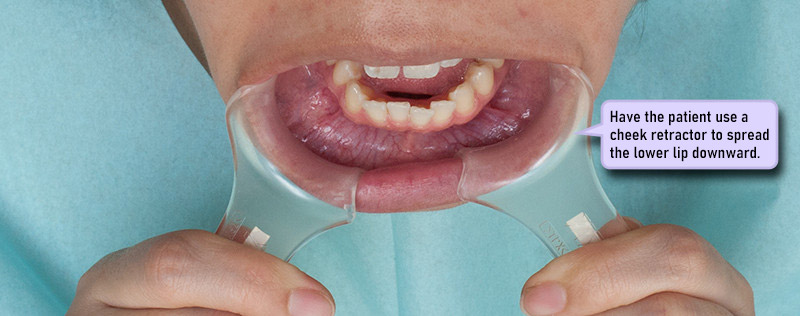
Ask the patient to shift the position of the cheek retractor toward the lower lip to facilitate the occlusal view. (Photo 9)
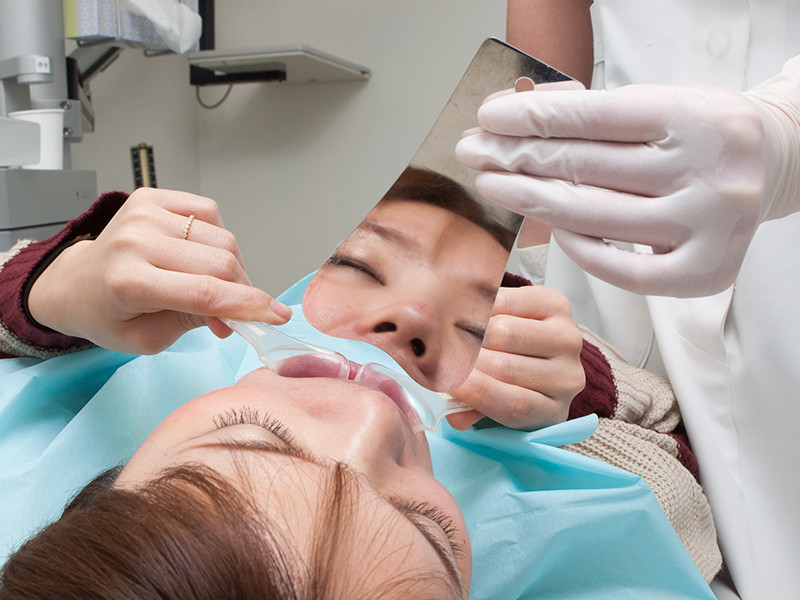
When inserting the mirror, ask the patient to bend the neck slightly to make it easier to take a picture. (Photo 10)
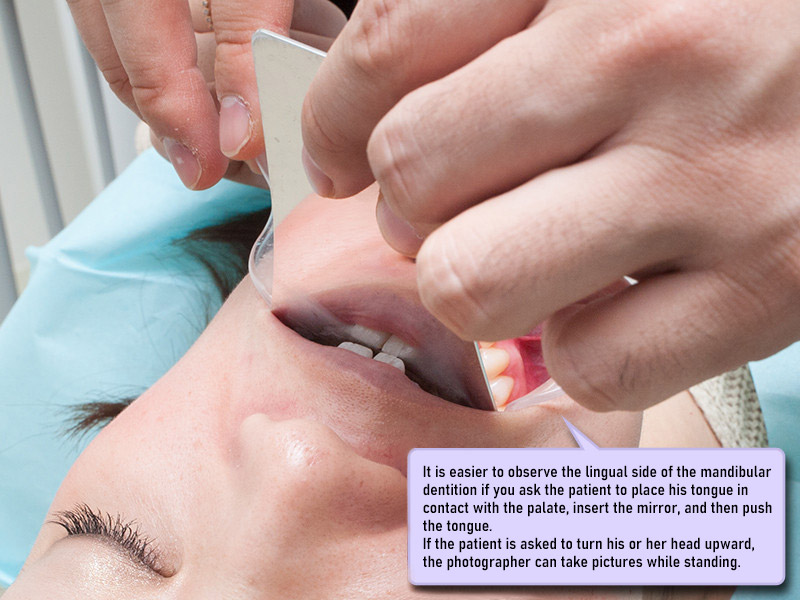
Since it is difficult to insert a mirror for viewing the occlusal surface with a large opening, ask for an opening of about one side finger and insert the mirror alternately on each side.
At this time, if the patient brings the tongue into contact with the palate, inserts the mirror, and then presses the tongue, it will be easier to observe the lingual side of the mandibular dentition.
If you start shooting in this state, the photographer will bend down, so ask the patient to bend his head backwards. In order to shoot properly, the photographer should be able to shoot while standing as normal as possible. (Photo 11)
Photographing the occlusal surface view (mandible)
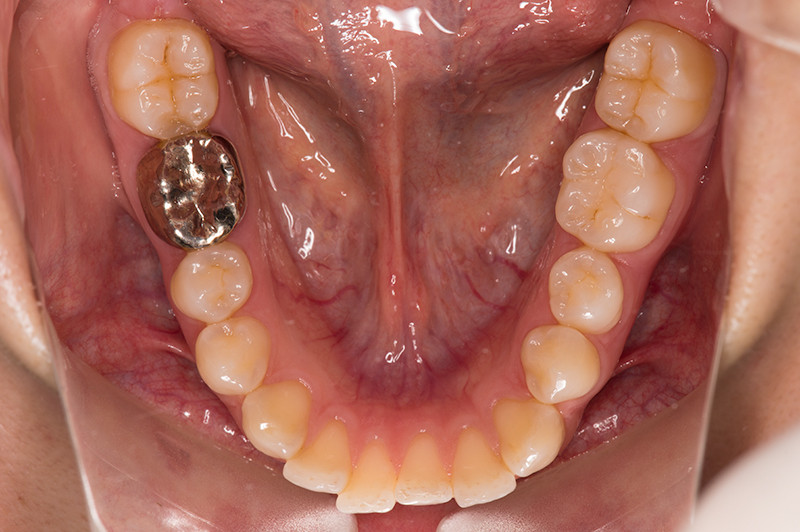
When taking an occlusal view (mandible), the patient is asked to tilt his neck slightly toward the photographer, so the photographer must also tilt the mirror and camera so that they are parallel to each other.
In the actual shooting, the focus point of the center in the viewfinder is set to No. 6 of the lower jaw, and the body is moved back and forth to find the position that is roughly in focus.
Then, press the shutter button halfway to focus on No. 6 of the lower jaw, then re-framing and press the shutter button all the way to the position where the entire lower jaw fits in the composition. (Refer to the shooting method with a fixed shooting magnification in the Part 1/2)
When removing the mirror, have the mouth closed a little to loosen the tension at the corners of the mouth, making it easier to remove the mirror.
Pull out the mirror with the mouth wide open, being careful not to damage the corners of the patient’s mouth.