Five-sheet method – How to take an occlusal view (maxilla)
Front view / Standing position when shooting
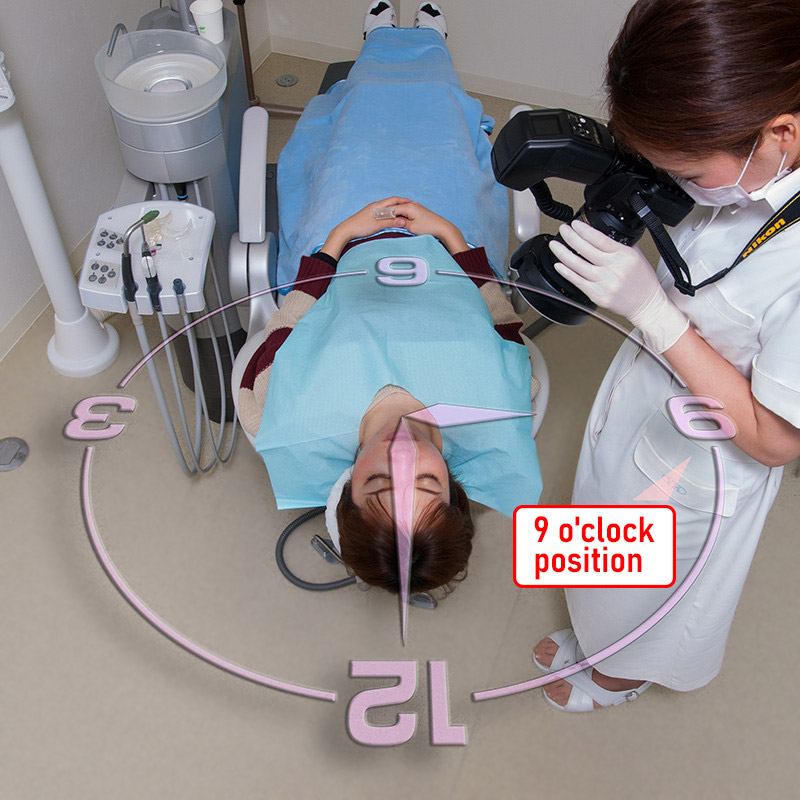
When taking the “occlusal surface view (maxilla)” of the five-sheet method, stand at the “12 o’clock” position when the patient’s head is defined as 12 o’clock. (Photo 13)
Position of the cheek retractor
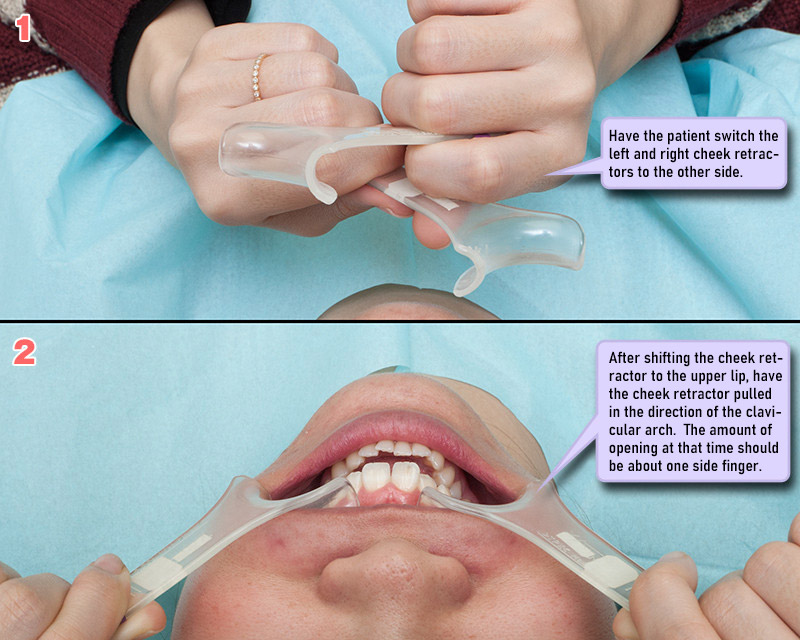
Ask the patient to change the position of the cheek retractor to make it easier to take a picture of the occlusal surface. (Photo 14)
First, have the patient switch the left and right cheek retractors to the other side.
When attaching it to the mouth, follow the same procedure as in Photo 2 to have the lower lip hooked in order from one side, slide it all the way to the upper lip, and pull the cheek retractor in the direction of the zygomatic arch.
The amount of opening at that time should be about one side finger.
Insert mirror
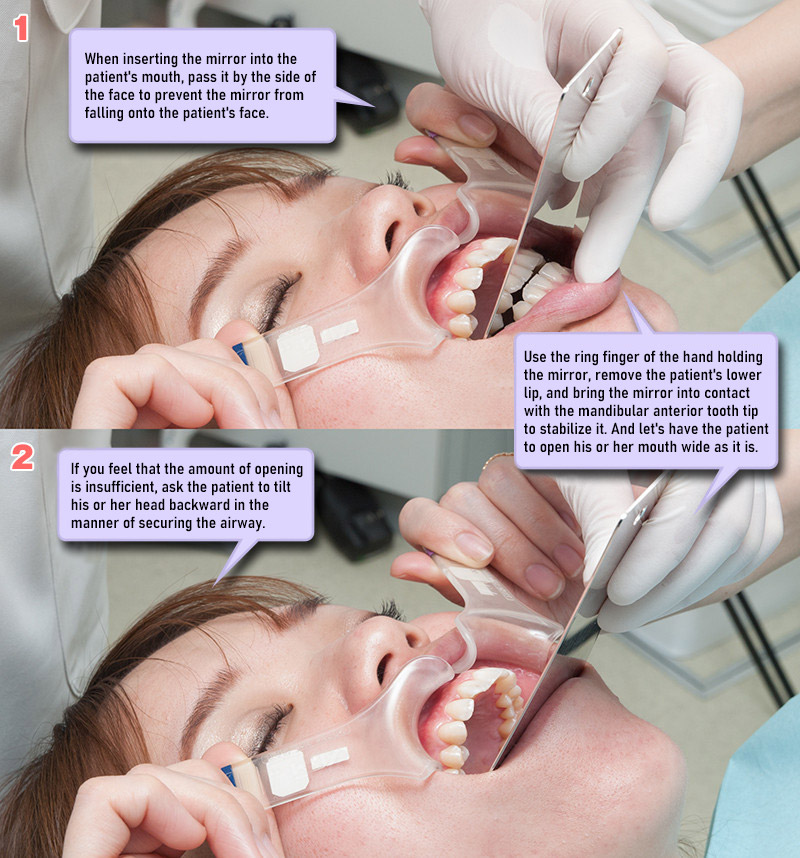
A mirror is inserted into the oral cavity to photograph the maxilla of the occlusal surface. You will be shooting the upper jaw reflected in this mirror.
When inserting the mirror into the patient’s mouth, pass it by the side of the face to prevent the mirror from falling onto the patient’s face. Also, since the mirror that captures the upper jaw is relatively large, when inserting the mirror, do not insert it straight into the oral cavity, but insert it one side at a time.
After inserting the mirror into the oral cavity, use the ring finger of the hand holding the mirror as shown in Photo 15, remove the patient’s lower lip, and bring the mirror into contact with the mandibular anterior tooth tip to stabilize it. And let’s have the patient to open his or her mouth wide as it is.
Photographing the occlusal surface (upper jaw)

Make sure that the occlusal surface of the upper jaw is completely reflected in the inserted mirror before starting shooting.
At this time, set the focus point of the center to No. 6 of the upper jaw, and move the body back and forth to focus.
When it is roughly in focus, press the shutter button halfway to lock the focus, re-framing and shoot. (Refer to the shooting method with a fixed shooting magnification in the first part)