

How to Start Off-Camera Lighting (1)
Updated: 2023/6/12
We will explain how to start "off-camera flash lighting," a technique for triggering a flash remotely, away from the camera. The necessary equipment consists of five items: a flash (i60A, MG-X, MG60, etc.), a commander (Air10s), a light stand (LS-50C, LS-55C, LS-65C, LS-20C, etc.), an umbrella*, and an umbrella holder (FT-01).
Because an umbrella is easy for beginners to handle, we recommend it as the first modifier you should purchase. There are two types of umbrellas: reflective and translucent. Here, we will use a translucent umbrella, which allows you to bring the light-emitting surface closer to the subject and easily take advantage of the softness of a large light source.
*2 Please purchase a commercially available translucent umbrella.
If you already own the flash mentioned above, you only need to acquire a commander, stand, umbrella, and umbrella holder to start "off-camera flash lighting."
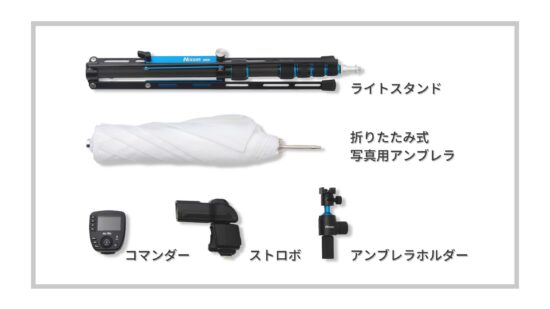
Equipment Setup / Pairing
First, we will explain how to assemble the kit.
① First steps
- Insert batteries into the "flash" and "commander."
- Set up the "light stand" and attach the "umbrella holder."
- Attach the "flash" and "umbrella" to the "umbrella holder."
② Pairing
1. Next, pair the flash and the commander. With the flash powered off, press and hold the "Power ON/OFF button" and the "Operation Lock button" simultaneously. The pilot lamp will blink yellow, and you will hear a series of "beep-beep" sounds. *On some models, you must press and hold the "Power ON/OFF button" and the "SET button" simultaneously.
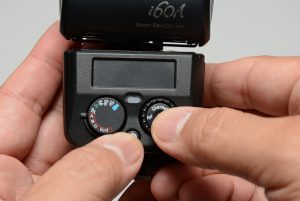
2. Next, with the commander powered off, press and hold the "Power ON/OFF button" and the "Operation Lock button" simultaneously. The commander's pilot lamp will blink yellow.
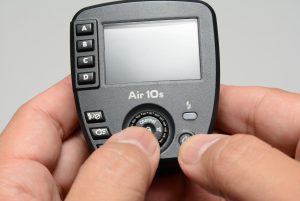
3. Once you take your fingers off the buttons, the flash will stop beeping, both the flash and commander will power on, and pairing is complete.
| Tip: "Pairing" is remembered even after the power is turned off, so you only need to do this once at the beginning. |
③ Group settings
To set the "i60A" flash to group "A," turn the mode dial and select the "A in the red circle."
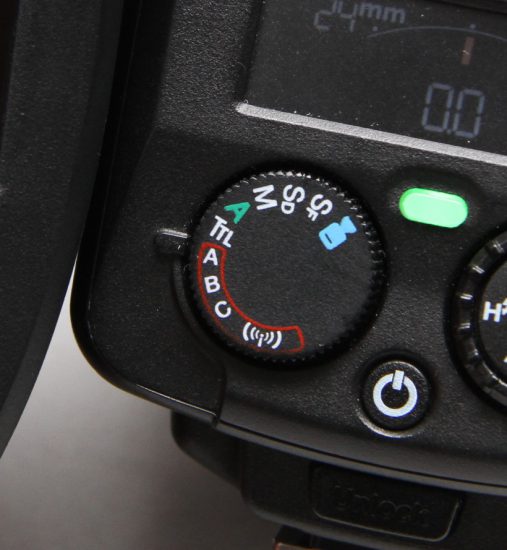
| Tip: When using only one flash, please set it to group "A." If you use a second flash, setting it to "B" will allow you to control groups A and B independently from a distance. |
④ Commander operation
|
"TTL" exposure compensation to memorize output level ↓ Adjustment in "M" mode |
- Use the "M/TTL" button on the bottom left to set to "TTL" (automatic light output adjustment). Since you are controlling the flash in group A, adjust the scale to the right of "A" on the commander. The center position is the correct exposure at "0.0." Turning the center dial changes the value in 0.3 EV increments.
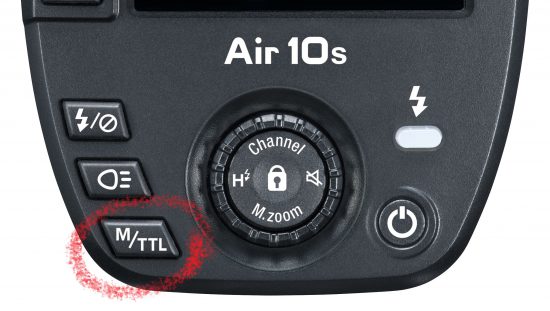
- If you want to brighten the exposure of the subject, turn the dial clockwise; to darken it, turn it counterclockwise. This adjustment is called "exposure compensation."
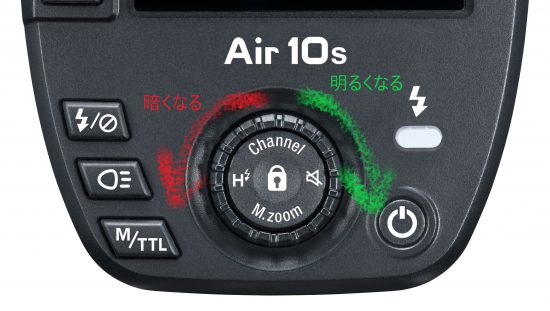
- Once you have achieved the desired brightness, press "M/TTL" to switch to "M" (manual light output adjustment).
- When you switch to "M," the light output level set during "TTL exposure compensation" is remembered ("TTL Memory").
- "M" mode also works like TTL; turning the dial clockwise increases brightness, and counterclockwise decreases it.
| Tip: Adjusting with "M" from the start involves more steps to get the correct exposure, so we recommend the method above for beginners. Once you get used to it, "M" mode allows for faster adjustments. |
Now that you know how to adjust the light output, let's try practicing portrait lighting.
Basic Lighting Methods
When lighting, first place the flash in the "basic position," then make "fine-tune" adjustments based on the subject's features. Finally, move on to "variations."
Lighting Workflow
▶ Basic Position
▶ Fine-tuning
▶ Variations
We will explain each of these in detail.
▶ Basic Position
45° angle to the subject, higher than eye level
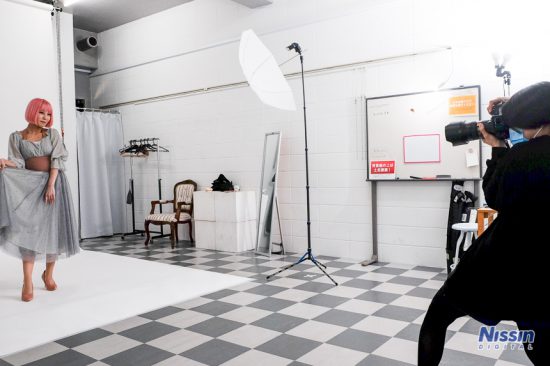
"45° angle"... This means a position approximately 45° to the right or left, relative to the line between the subject and the photographer.
"Higher than eye level"... Set the height of the flash so that it is higher than the subject's eye level when viewed from the subject's perspective.
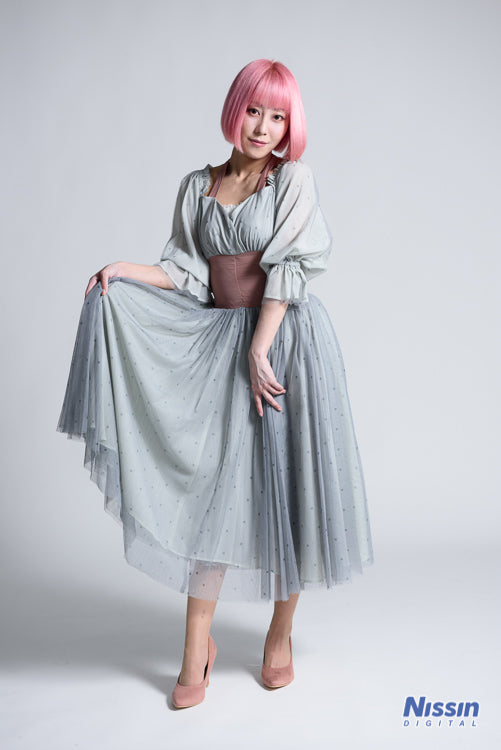
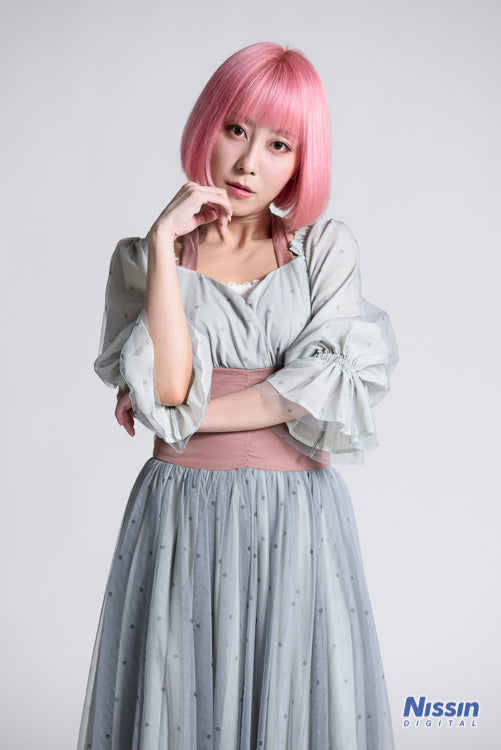
This lighting provides beautiful illumination with moderate shadows for a three-dimensional effect. The shadows bring out the texture of clothing, creating a high-quality look. Lighting from above eye level tends to create a natural impression.
This is a basic lighting setup with a moderate sense of depth. When you are unsure about lighting, starting from this basic position is recommended.
▶ Fine-tuning
While the basic position is a standard setup that rarely fails, it is not universal.
"The subject's image and skin condition," "facial features like contours and part sizes," and "the type of clothing worn" mean that the appropriate way for light to hit the subject varies. Sometimes you will need to fine-tune from the basic position, so let's look at how to adjust.
◎Image: "Cool" suits side-lighting, "cute" suits front-lighting
If you want to shoot with a cool image, such as a male subject, position the light where the 3D effect is emphasized (side-oriented). If you want to bring out cuteness or create a soft image for women or children, it is often better to adjust to a front-oriented position that does not overly emphasize 3D effects.
◎Skin: Adjust to the front if you are concerned about wrinkles or skin texture
Lighting from the front makes wrinkles and skin blemishes less noticeable, making the skin look better.
◎Facial contours and features: Adjust so that areas of concern are not emphasized
Adjust the position so that the subject's facial features—such as contours or the size of parts—that you are concerned about are not highlighted. Because shadows emphasize depth, if you want to soften the 3D effect, move to the front or lower the height of the light source. Conversely, if you want to emphasize 3D effects, move to the side or raise the light source.
◎Costume shape and texture: Adjust toward the side to emphasize the shape and texture of clothing
If you want to make the shape or texture of the clothing the main focus, fine-tune the angle of the light so it doesn't look too different from reality. To express the texture of clothing, it is best to adjust the flash toward the side.
Tip
When using single-light lighting, decide clearly what your priority is. The above is just a reference example. Ultimately, you should judge whether to place the flash toward the side or the front by looking at the resulting photograph.
▶ Variations
Once you have finished adjusting the basic position, let's take some variations. There are three basic patterns for variations and their combinations.
○ Concentric: Move the flash in a circle around the subject.
・When moving in a concentric arc, the distance to the subject remains constant, so there is almost no need to change the flash output.
・Make sure to adjust the flash head so it points toward the subject.
・Moving toward the front creates a younger impression; moving toward the side creates a more mature feel; and placing it further toward the back creates a more dramatic, shadowy look.
*Note: When placing the light from the side to the back, the flash light has less effect on exposure, so TTL cannot be used. Please adjust the light output using M mode.
⇅ Vertical: Extend or retract the light stand to move the flash up and down.
・Increase light output when moving higher; decrease when moving lower.
・Also adjust the vertical angle so the flash head points toward the subject.
↔ Distance: Move the flash closer to or further from the subject.
・Decrease light output when moving closer; increase when moving further away.
・Also adjust the vertical angle so the flash head points toward the subject.
Now, let's take a closer look at the changes in variations on the next page.
[Concentric movement: Approx. 23° (front-oriented)]
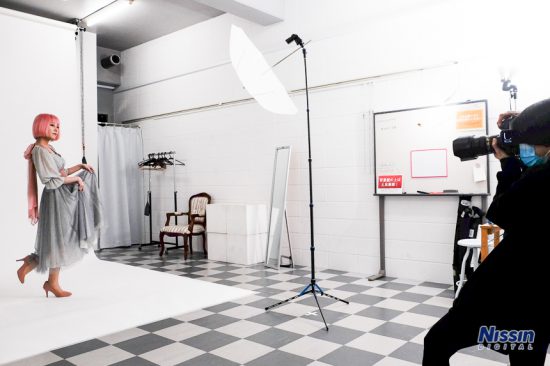
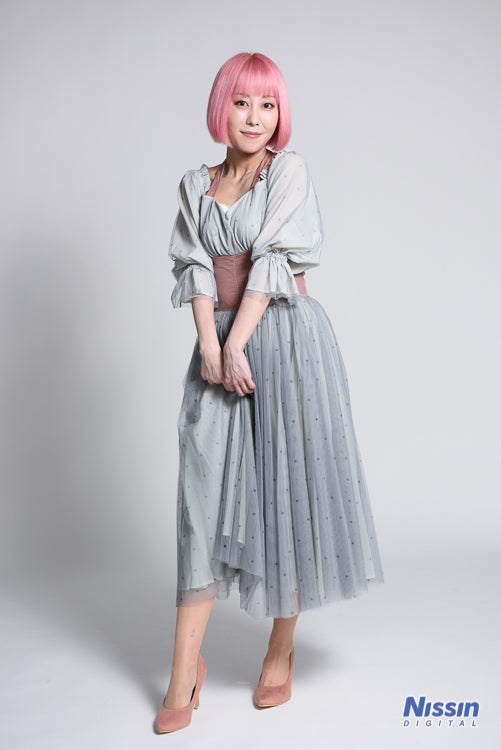
Compared to the basic position, the light wraps around well, creating a brighter impression.
It looks slightly flatter than the 45° photo, but still maintains a moderate sense of depth. There are fewer shadows, making facial expressions look brighter.
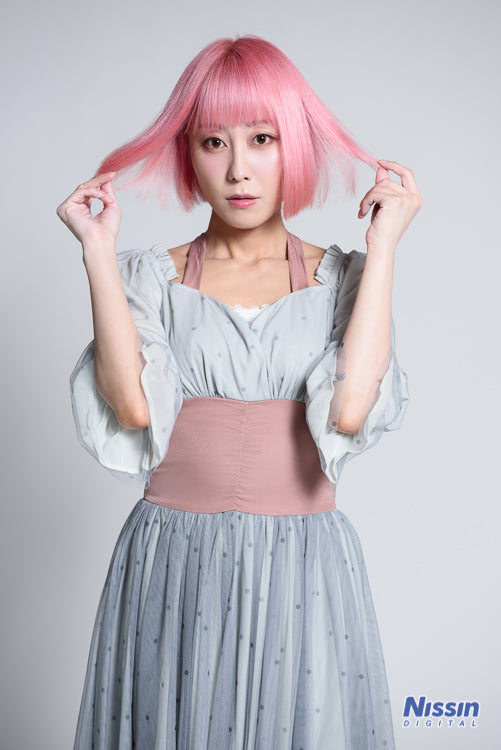
Recommended when you want to create softness and brightness while still maintaining a little depth.
[Concentric movement: 0° (front)]
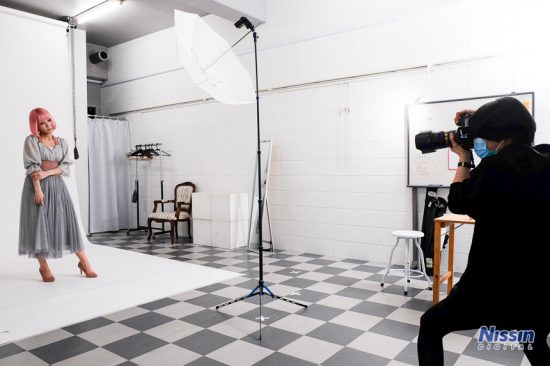
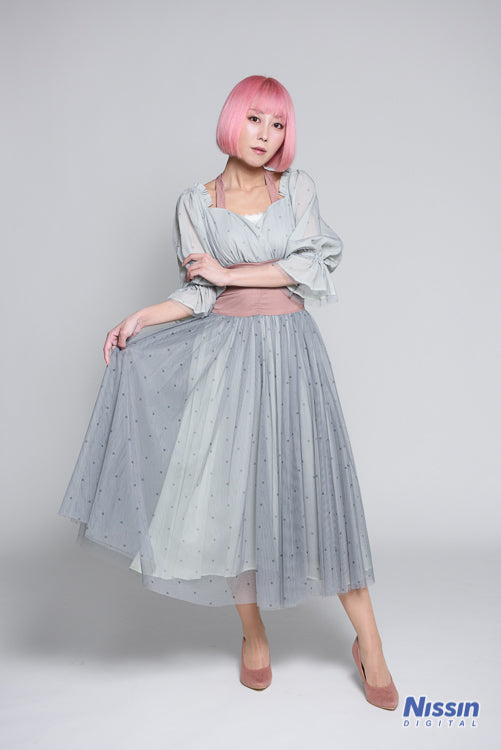
Compared to the basic position, there are almost no shadows. Because there is height, shadows only appear downward (e.g., under the chin).
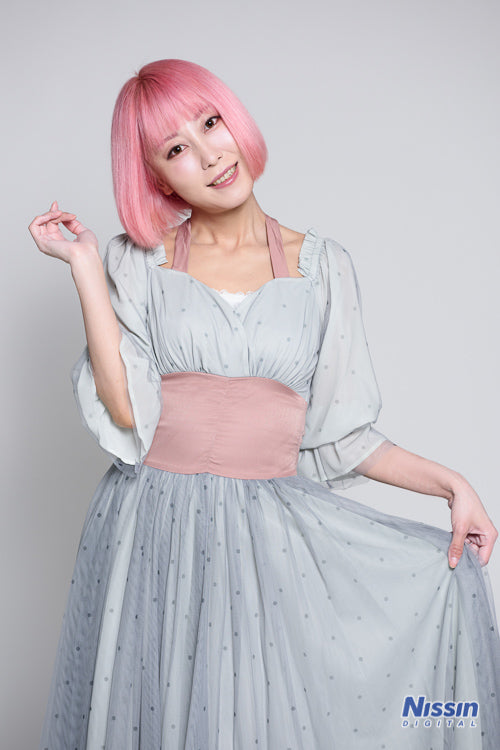
Since no horizontal shadows are created, there is not much sense of depth.
A lighting style to use when you want to give a bright, energetic, or youthful impression.
Now, let's move from the basic position toward the side (of the subject).
[Concentric movement: Approx. 68° (side-oriented)]
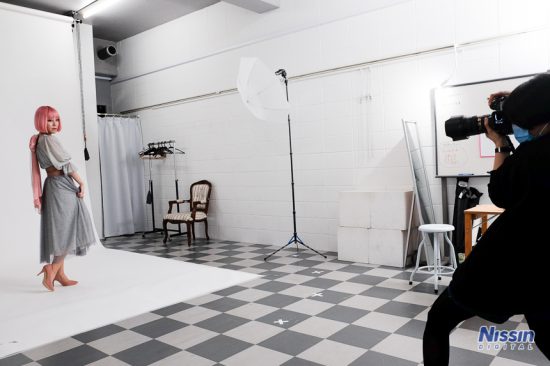
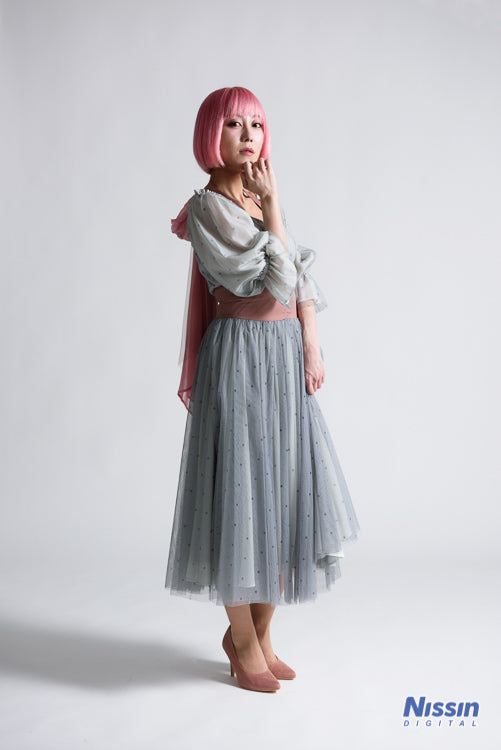
Compared to the basic position, the area of shadow increases. It has a more three-dimensional and slightly darker atmosphere.
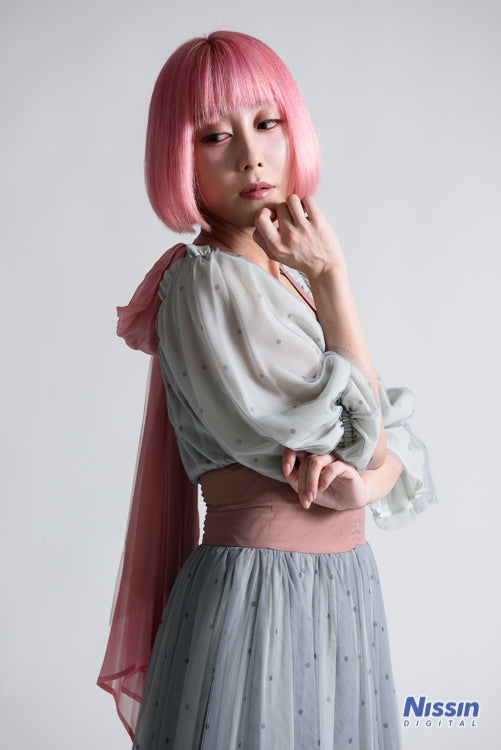
Lighting used when you want to create a cool mood, moody expressions, or a mature look.
[Concentric movement: 90° (from the side)]
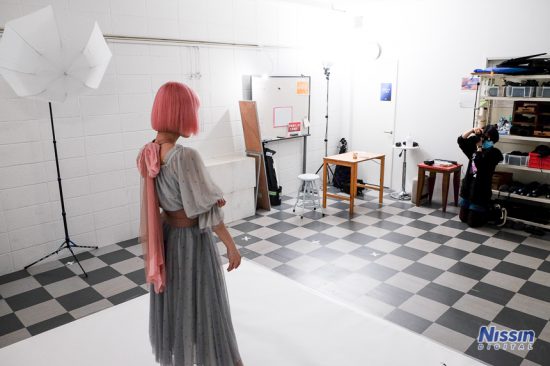
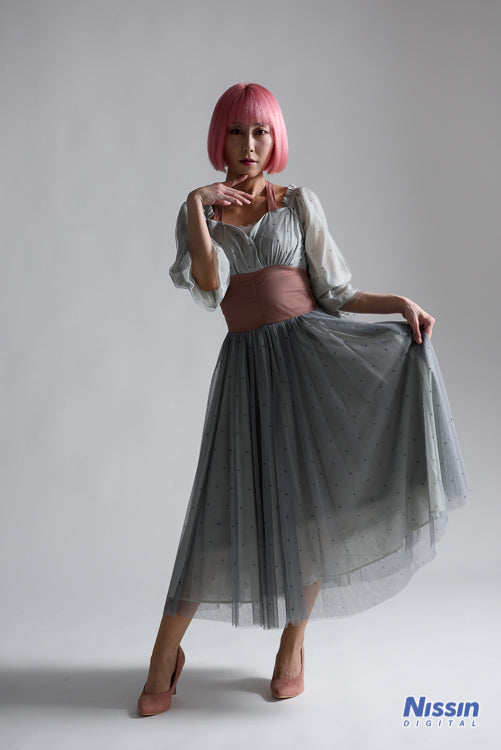
Lighting where half of the face is in shadow is what is known as split lighting.
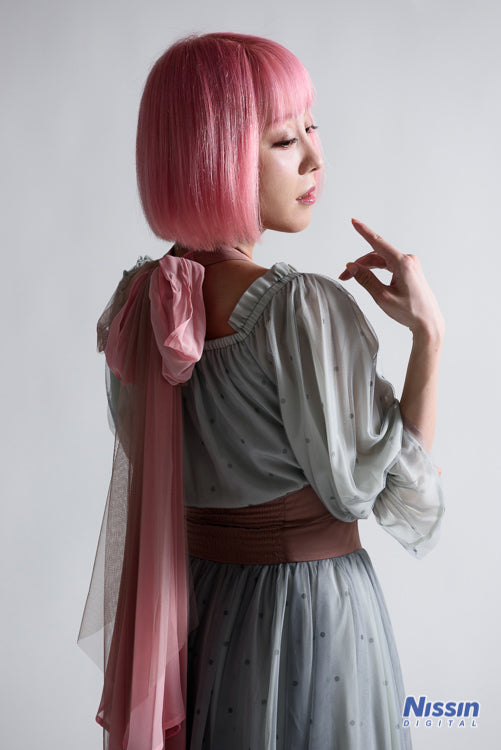
Lighting to use when you want to create a dark or cool atmosphere. Because the light hits from the side, having the subject look toward the light to capture their profile is also recommended.
Next, moving further toward the back from the side will increase the shadows even more.
[Concentric movement: Approx. 113° (back-oriented)]
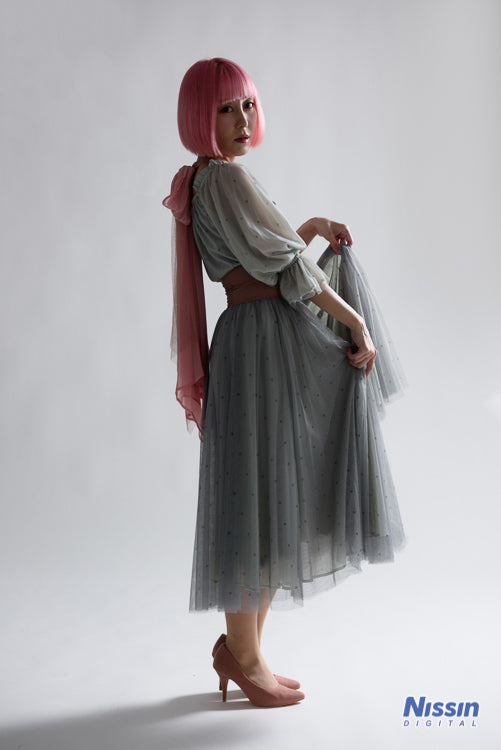
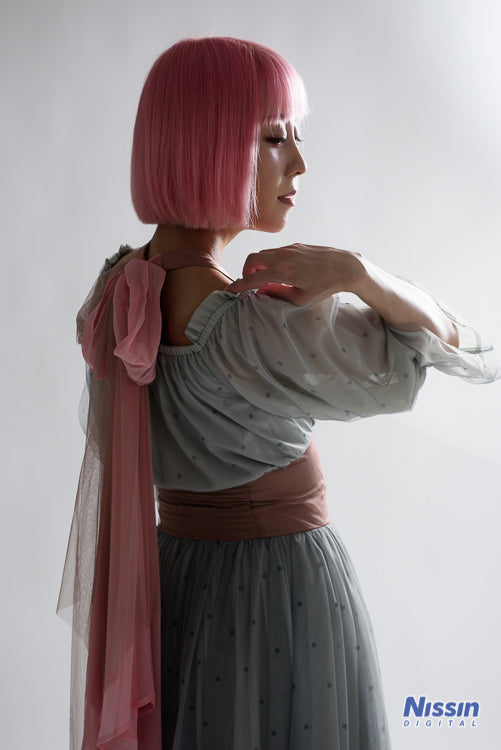
This light is known as half-backlight; facial features become darker, creating a dramatic expression.
The more shadows increase, the more imaginative the expression becomes.
[Concentric movement: Approx. 135° (back-oriented)]
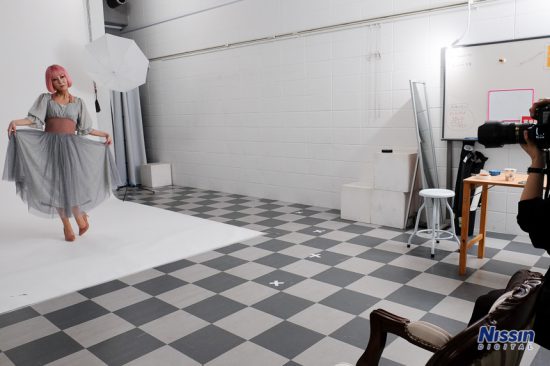
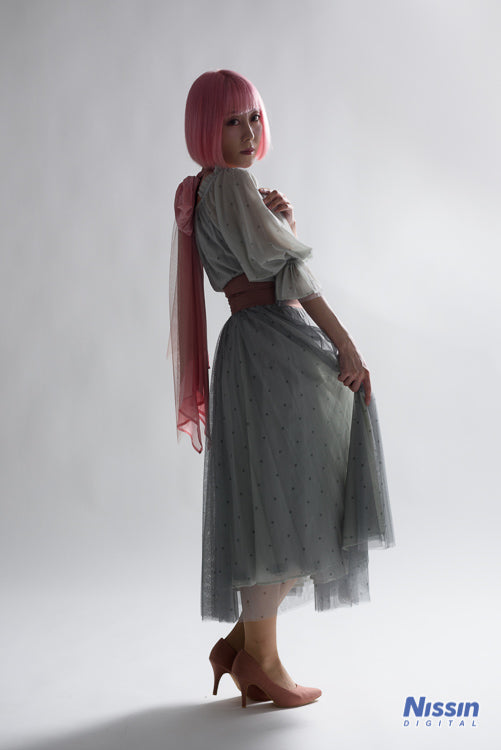
Compared to the basic position, almost no light hits the face, and the silhouette is further emphasized.

Reflected light from white walls or background paper wraps around, making the expression faintly visible, but if you place a black reflector on the shadow side to tighten the image, it will be completely in shadow.
Conversely, if you want to lighten the shadows, place a white reflector or foam board on the shadow side.
Lastly, let's look at the changes when altering the "↔ distance."
Regarding changes when altering "↔ distance," first, here is the result when the distance between the subject and the light is about 2m30cm. We will move closer to the subject from a position of about 23° (front-oriented).
[Distance: Approx. 2.3m]
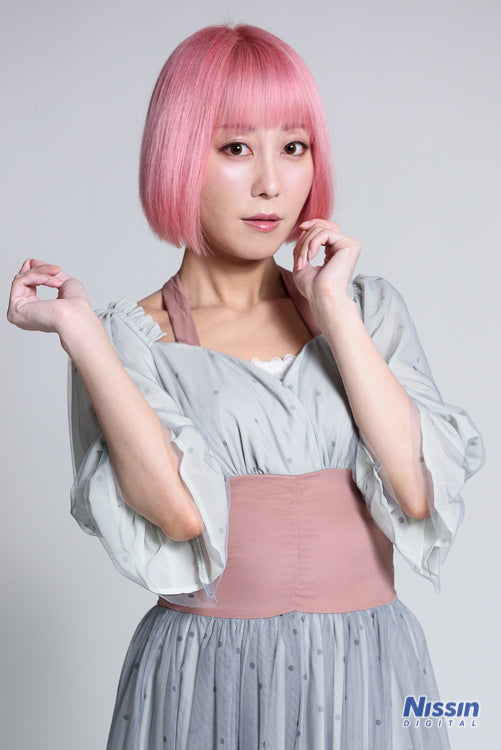
Because the light wraps around well, the shadows are light. Since the light reaches the background paper, the white background paper appears as a light gray.
While there is softness from the umbrella, the image is still distinct.
[Distance: Approx. 1m]
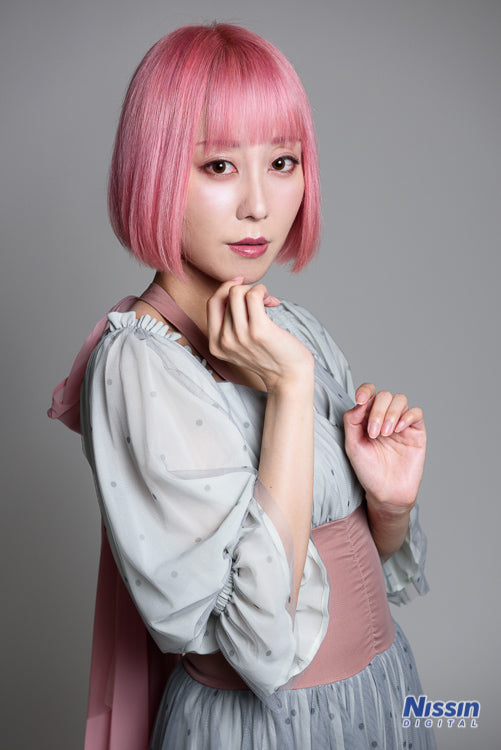
The light wraps around less, and the shadows fall off significantly, creating a sharp impression. Light wrapping to the background is also reduced, appearing as dark gray.
By bringing the light closer,As shown above, you can continue to shoot variations.
Please try practicing until you can adjust the basic position and shoot variations according to your objective smoothly.https://www.nissin-japan.com/column/plk-2
For those who want to know or hear more, please watch our
YouTube channel or participate in our workshops.
Model: Himeko Arisugawa
Photography/Writing: Ai Ehara
Supervisor: Kimiyuki Kunito