Common (All Models / Multiple Models) Frequently Asked Questions (FAQ)
These are frequently asked questions and answers common to (all models/multiple models). You can narrow down the question you are looking for using the search box at the top of the page. If the issue is not resolved, please contact us.
List of Questions (15 items)
- Flash sync issues when shooting off-camera!?
- Summary of pairing methods for NAS-compatible strobes
- It won't fire, or the photo comes out too dark (or bright) – is it broken?
- Troubleshooting on-camera flash failure (when the flash is mounted directly to the camera)
- What to do when NAS system signal range is poor
- Is high-speed sync (FP flash/HSS) supported?
- What are SD/SF modes (slave modes)?
- It won't fire even when the green lamp is lit
- The flash fires multiple times before the shutter releases
- The "channel" in the NAS system and how to change it
- Can I change (modify) the mount?
- High-speed sync is (not setting up / turning off automatically)
- Why is there a "channel" if it's a pairing system?
- Troubleshooting off-camera flash failure (when using the flash remotely)
- Cannot change the zoom (irradiation angle)
Q. Flash sync issues when shooting off-camera!?
Q. Summary of pairing methods for NAS-compatible strobes
Thanks to you, starting with the first NAS-compatible products, the "Di700A" and "Air1," it has been supported by a wide range of users for its many advantages, such as TTL flash support and remote control of light output and zoom irradiation angle.
Since NAS-compatible strobes communicate only with the device they are paired with, you must pair them before use. *1
This pairing is generally not lost during normal use *2, and is basically maintained even if batteries are changed or a reset is performed. However, it may be necessary to re-pair if you add a new strobe or if trouble occurs in the field.
So today, we will introduce the pairing method for all NAS-compatible products with photos!
*1 Pairing is not required when using Open Mode.
*2 When you perform a pairing operation with a new commander, the old commander's pairing information on the strobe or receiver is overwritten and deleted. Therefore, if you share one strobe or receiver with multiple commanders, you must perform the pairing operation each time you switch commanders. (Excluding when using Open Mode).
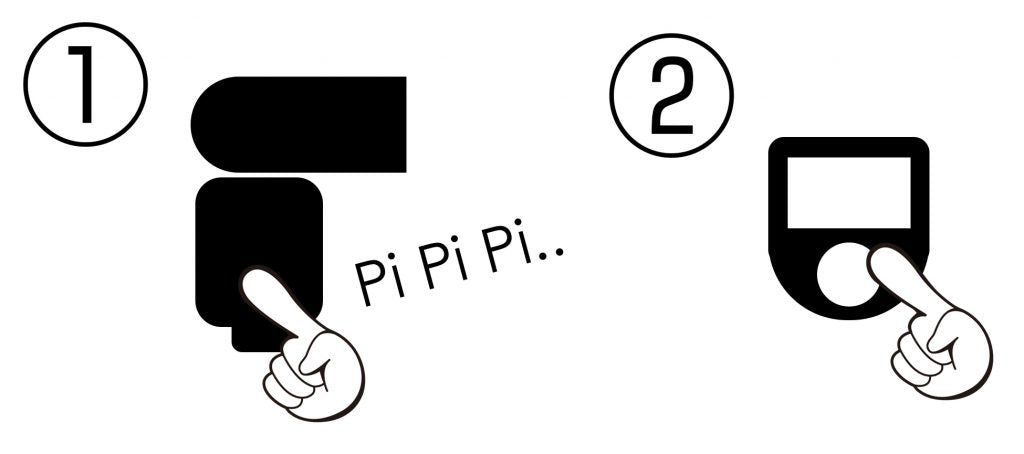 ・With the power off, hold down the button in the center of the dial while long-pressing the power button.
・Perform the pairing operation in the order of ① Strobe → ② Commander
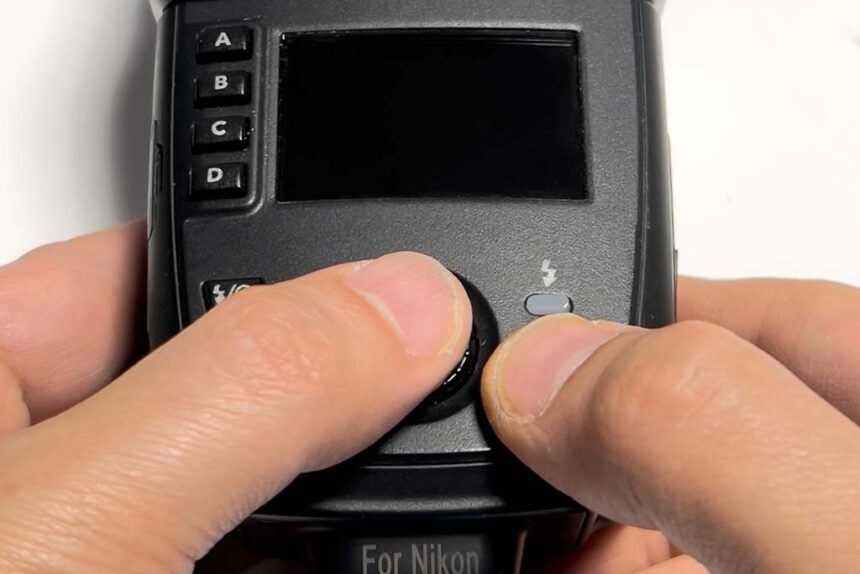 After turning on the power of the MG80 Pro, long-press the power button again for 3 seconds to open the operation mode selection screen.Turn the select dial to choose slave mode "SL," and press the button in the center of the dial to confirm.Press the power button to turn off the power, then hold down the center of the dial while long-pressing the power button.When the buzzer starts sounding and the pilot lamp begins to flash yellow, it has entered pairing standby mode, so you can release the button.
After pairing is complete, press the group selection button (A–D) to determine the group.
If necessary, long-press the modeling light button (light icon) to switch between Basic Group/Advance Group, and long-press the mode button (M/TTL display) to switch to Open Mode.
i60A MG60
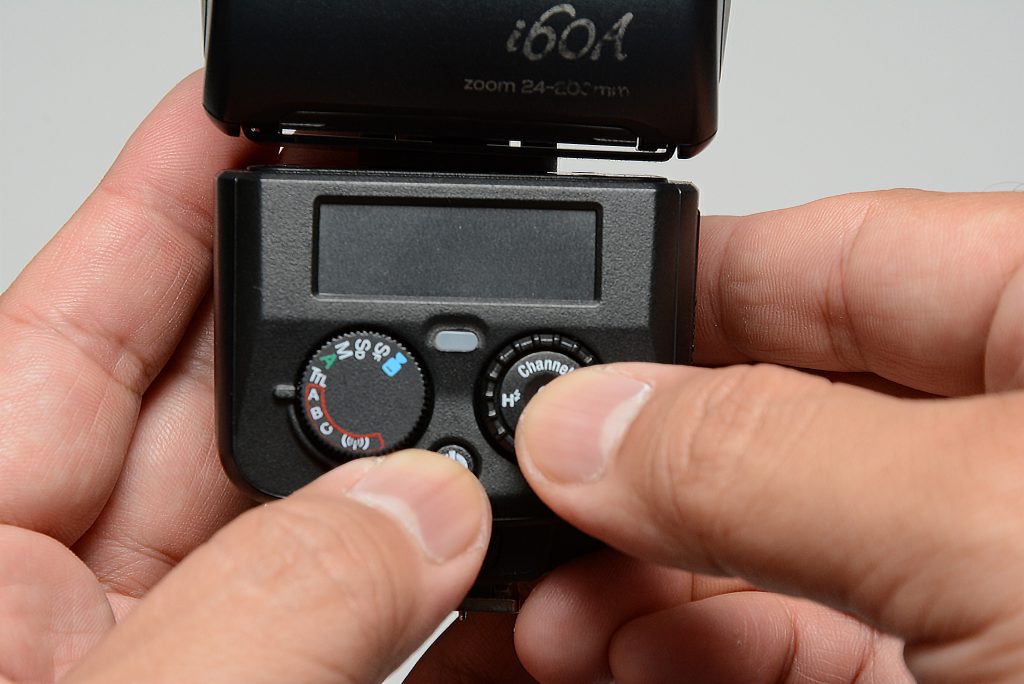 Turn off the power, then hold down the center of the right dial while long-pressing the power button.When the buzzer starts sounding and the pilot lamp begins to flash yellow, it has entered pairing standby mode, so you can release the button.
After pairing is complete, to use it wirelessly, set the left mode dial to either A/B/C within the red frame (i60A) or the radio mark below MT (MG60).
MG10 MG8
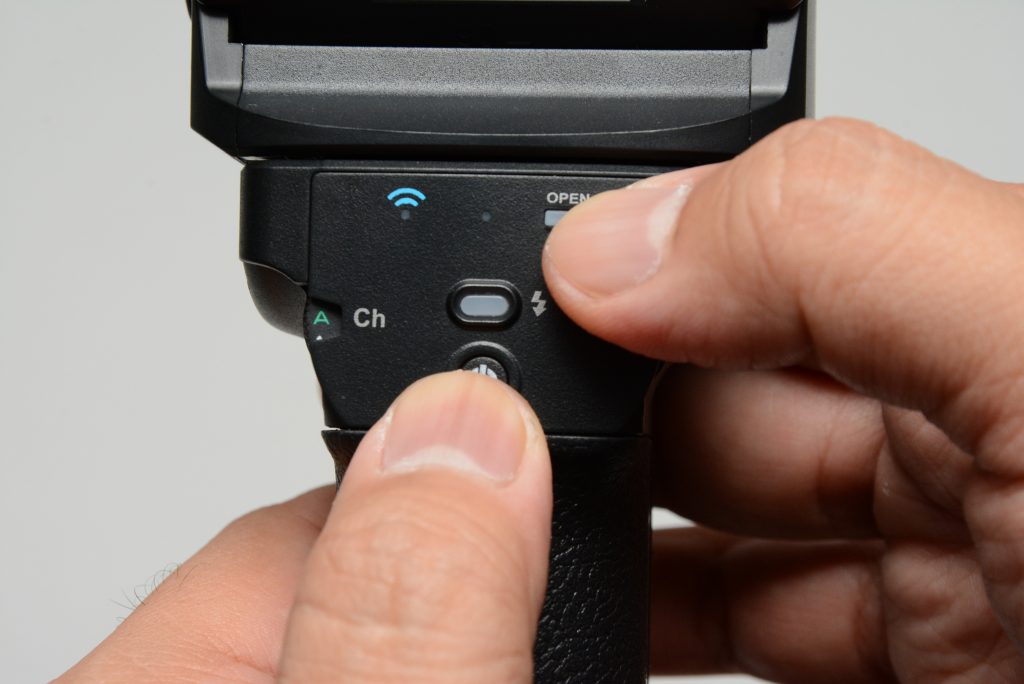 Turn off the power, then hold down the OPEN button while long-pressing the power button. (At this time, be careful not to press the shutter button of the MG10 or MG8 at the same time.)
When the buzzer starts sounding and the pilot lamp begins to flash yellow, it has entered pairing standby mode, so you can release the button.
After pairing is complete, set the right flash group dial to the desired group.
Please note that if the dial is set to the red circle mark (wireless shutter mode), remote firing from the commander will not be possible.
Di700A
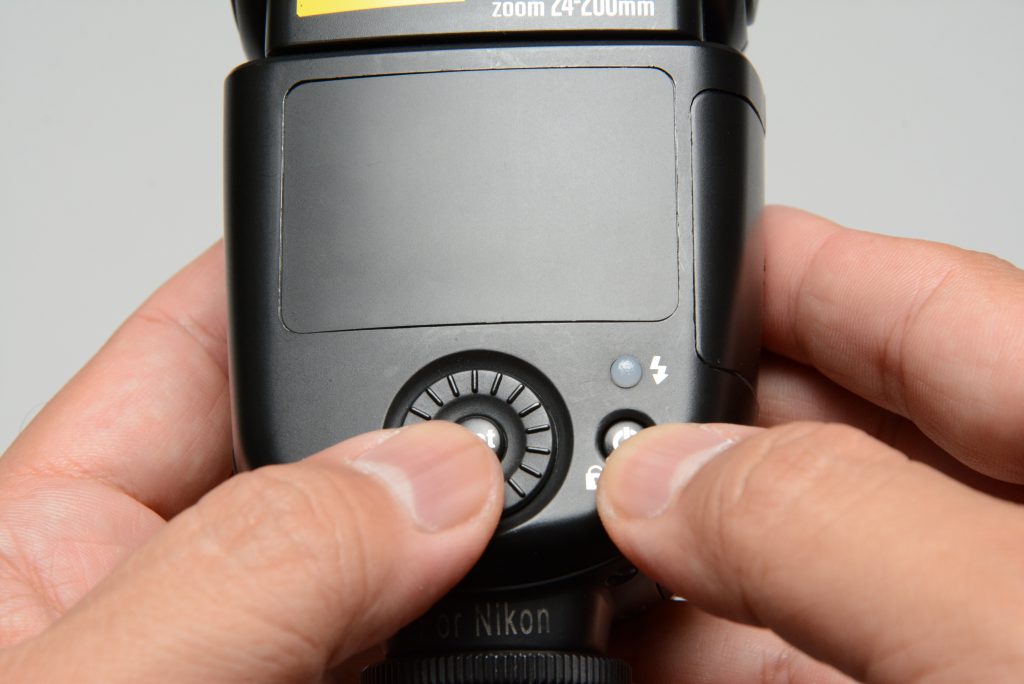 Turn off the power, then hold down the "Set" button in the center of the dial while long-pressing the power button.When the buzzer starts sounding and the pilot lamp begins to flash green, it has entered pairing standby mode, so you can release the button.
After pairing is complete, select the wireless shooting mode (purple radio mark on the far right of the display panel) as needed, select one of the flash groups (A/B/C), and you are ready.
AirR
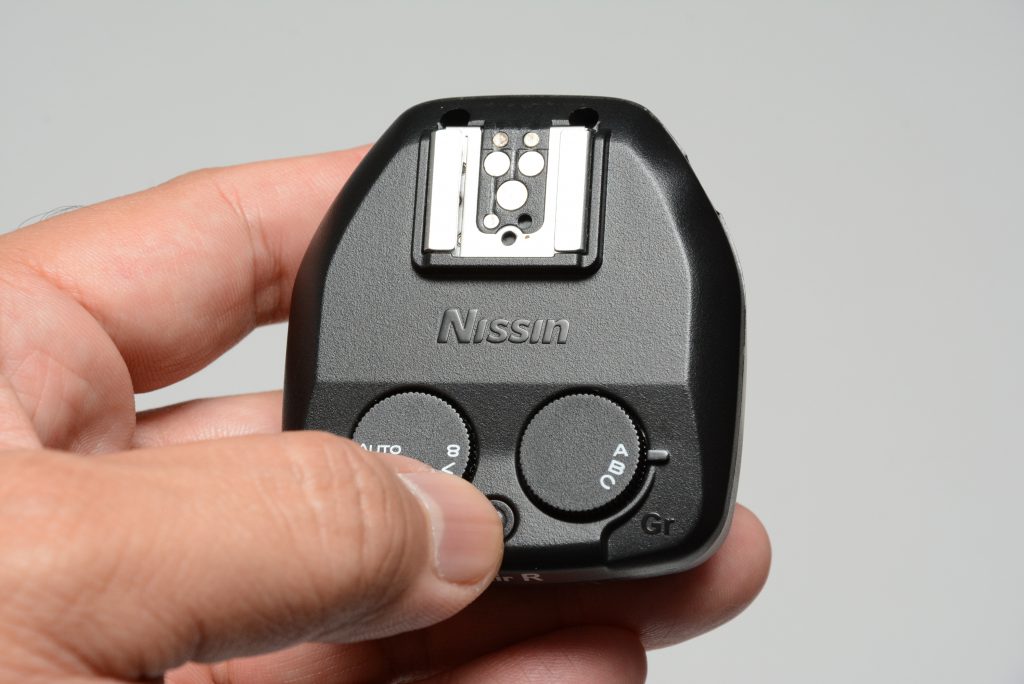 Turn off the power, then long-press the power button; the buzzer will sound, and it will enter pairing standby mode.After pairing is complete, set the left group dial to A, B, or C as needed.
Even if you are using the strobe attached to the AirR in manual flash mode,
please set the flash mode to "TTL" and the flash exposure compensation to "0.0EV." The flash output will be adjusted entirely from the commander side.
(The display on the strobe attached to the AirR is not linked to the commander's display. The commander's display reflects the setting values.)
Also, depending on the strobe used, you may need to change the "Guide Number Change Mode" setting of the AirR.
For other details, please refer to the compatibility table (Camera Compatibility Table) and the instruction manual.
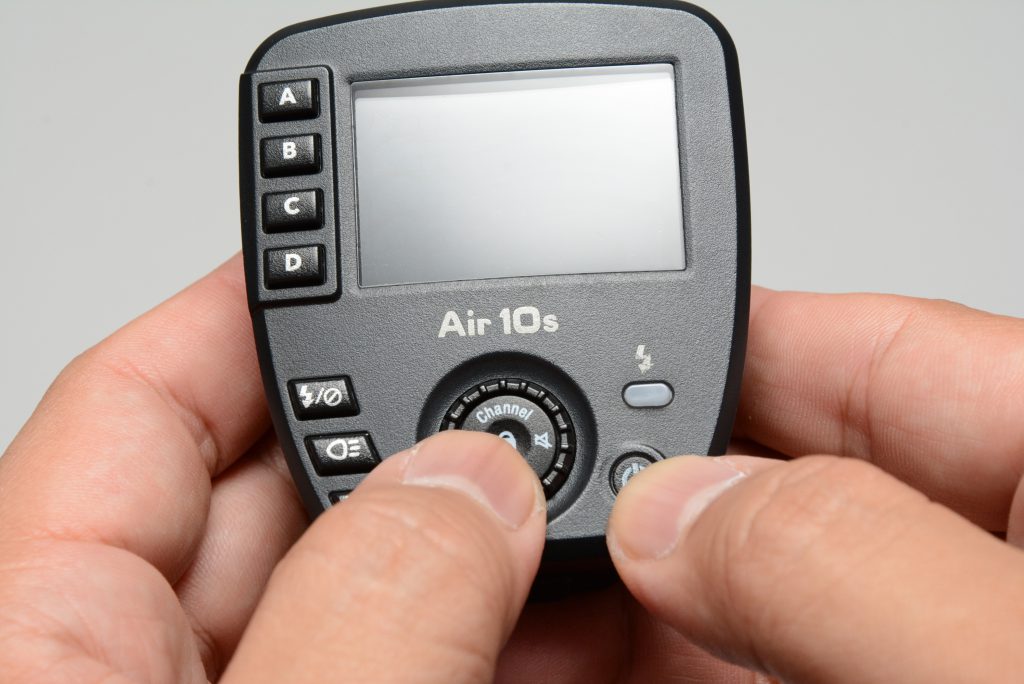 Turn off the power, then hold down the center of the dial while long-pressing the power button.When the display on the screen disappears and only the pilot lamp begins to flash yellow, it has entered pairing standby mode, so release the button.
If you keep holding the button at this time, pairing will not be completed, so please be sure to release your hand from the button once it reaches standby mode.
Air1
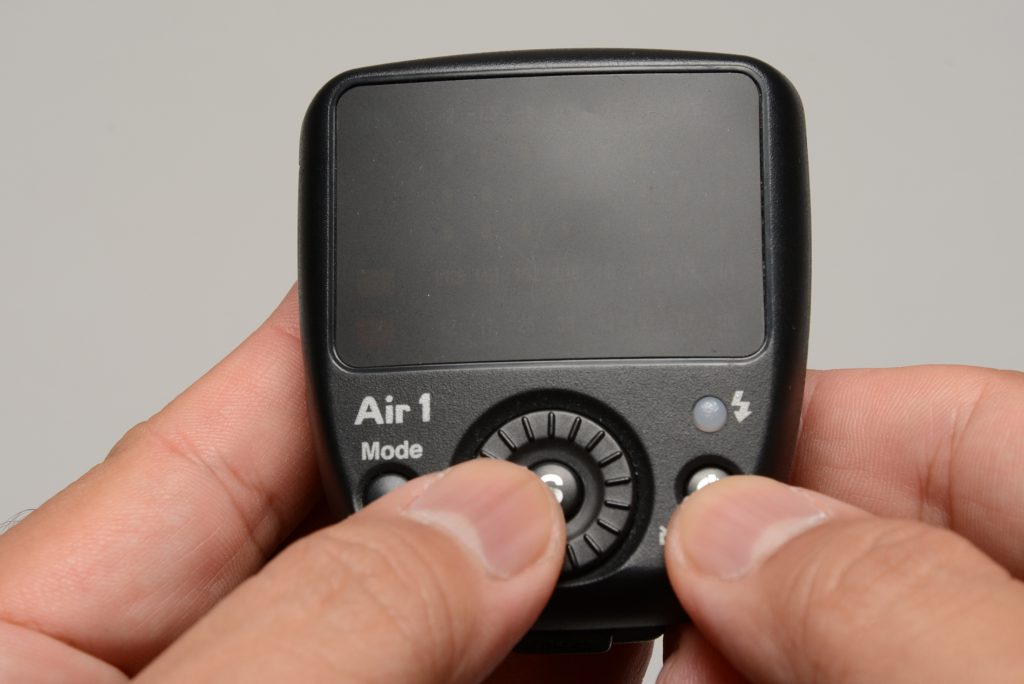 Turn off the power, then hold down the center of the dial while long-pressing the power button.When the lamp display on the screen disappears and only the pilot lamp (orange or white) begins to flash, it has entered pairing standby mode, so release the button.
If you keep holding the button at this time, pairing will not be completed, so please be sure to release your hand from the button once it reaches standby mode.
MG80 Pro
After turning on the power of the MG80 Pro, long-press the power button again for 3 seconds to open the operation mode selection screen.Turn the select dial to choose commander mode "CO," and press the button in the center of the dial to confirm.Press the power button to turn off the power, then hold down the center of the dial while long-pressing the power button.When the display on the screen disappears and only the pilot lamp begins to flash yellow, it has entered pairing standby mode, so release the button.
If you keep holding the button at this time, pairing will not be completed, so please be sure to release your hand from the button once it reaches standby mode.
The operation itself is very simple, but if you keep it in the back of your mind for troubleshooting, it will surely be useful someday.
Q. It won't fire, or the photo comes out too dark (or bright) – is it broken?
Applicable models: All strobes and commanders
In this case, the following causes are possible.
Additionally, if you are using the Air 1, Air10s, or MG80 Pro (commander mode), please also refer to the FAQ for each model.
-
Communication failure between camera and strobe due to poor hot shoe contact
Please clean the hot shoe of the camera and the metal parts of the strobe mounting foot using anhydrous ethanol or a household neutral detergent diluted with water. -
Program malfunction
In rare cases, the program may malfunction and cease to work normally, so please reset the strobe. -
Using high-speed sync
When using high-speed sync (FP flash), unlike normal flash, the guide number decreases as the shutter speed increases (even if fired at the same light intensity, the photo will look darker). Therefore, when using high-speed shutter, underexposure is common even if fired at full power. -
Firing before the strobe has finished charging
If you release the shutter before the strobe has finished charging (before the pilot lamp changes from red to green), such as during continuous shooting, it may not fire with the correct light intensity or may not fire at all.
We recommend decreasing the flash output by raising the ISO sensitivity, opening the aperture, or stopping high-speed sync; increasing the flash interval; using new batteries; or reducing the charging time by using an external power source like the Power Pack PS 8. -
Using an unsupported combination
Even if the camera and strobe (commander) have the same mount, there are combinations that will not work correctly depending on the model.
Please refer to the "Compatibility Table" on each product page to see if our products can be used with your camera. -
Degradation of the flash tube
Since the strobe's flash tube is a consumable part, if it is used frequently, especially at high power or with high-speed sync, the tube may degrade in a short period due to heat, resulting in incorrect light intensity or failure to fire.
If none of the above 1-5 apply, the flash tube may be degraded and require repair. Please apply for a repair via the Repair/Inquiry page.
Please note that because flash tubes are treated as consumables, repairs will be charged even if within the warranty period.
Q. Troubleshooting on-camera flash failure (when the flash is mounted directly to the camera)
Last updated: June 10, 2024
The flash won't fire when I try to use it after a while! It suddenly stopped firing! The flash fires, but the photos are dark. Here we explain how to inspect and take countermeasures in such cases.
There are roughly two cases where it won't fire: "it won't fire from the start" and "it suddenly stops firing."
- Click here for MF18 troubleshooting
- Click here for troubleshooting off-camera flash failure
When it won't fire "from the start"
【Checking the hot shoe connection】
- Insert the strobe's mounting foot firmly all the way in.
- For models equipped with an Unlock button, you may be able to insert it further by pressing that button while sliding it in.
【Checking camera settings】
- If the camera's flash setting is set to "Flash Off," please disable it.
- Please disable "Silent Mode," "Quiet Mode," "Silent Shooting," or "Manner Mode" on the camera. (Except for cameras that allow flash use even when using an electronic shutter.)
- Some cameras stop flash firing when set to "Electronic Shutter" (e.g., Canon R5, R6).
【Resetting the strobe】
How about resetting the MG10, i40, Di600, etc.?
Note that strobe products other than those mentioned here (MG10, i40, Di600, etc.) reset automatically when the power is turned off, so they do not have a built-in reset function.
【Cleaning the hot shoe】
Especially for cameras or strobes that haven't been used for a while, the cause is very often in the contacts of the hot shoe or mounting foot. Below, we introduce how to clean the hot shoe and mounting foot.
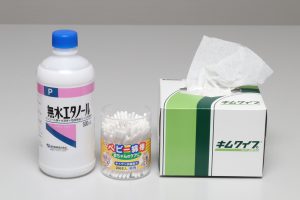
These are the 3 items needed for cleaning the shoe area.
Items needed
・Anhydrous ethanol・Cotton swabs
・Cleaning paper
Anhydrous ethanol is used for cleaning the terminals. It costs about 1,200 yen per bottle at a pharmacy. Disinfectant ethanol is not recommended because it contains water.
If you absolutely cannot obtain it, disinfectant alcohol or a neutral detergent diluted 10 times with water is acceptable, but be careful not to let moisture enter the inside of the equipment by applying too much. Also, using contact revival agents is not recommended because they may damage the material or loosen the screws.
Baby cotton swabs have thin tips unlike standard cotton swabs, and we use this thinness. I use Kimwipes for paper, but tissues can be used as a substitute if you are careful about lint.
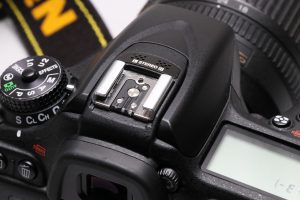
Many people know that the round terminals communicate with the strobe, but the rail parts on both sides are also used for grounding, and it is common for these to be dirty.
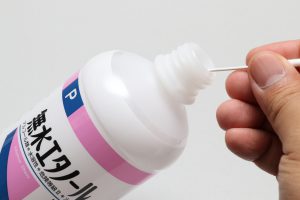
Soak the paper or cotton swab with anhydrous ethanol and start cleaning.
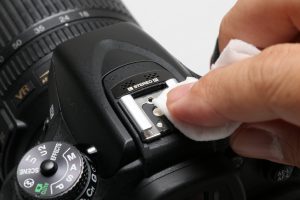
Wipe the terminals thoroughly with paper soaked in anhydrous ethanol. (Be careful not to let fibers get stuck in the gaps.)
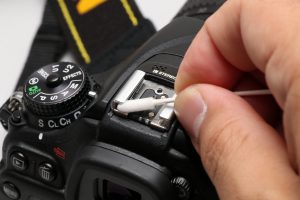
Using baby cotton swabs soaked in anhydrous ethanol, also clean the grooves of the rails on both sides thoroughly.
Next, clean the strobe side.
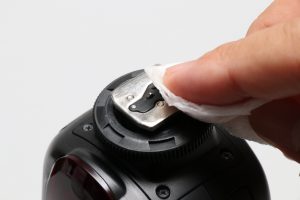
Follow the same procedure to clean the strobe's mounting foot.
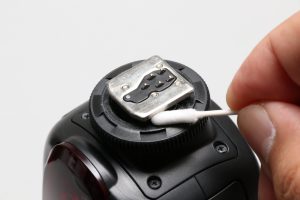
Clean the grooves on both sides thoroughly as well.
This concludes the cleaning of the shoe area.
Caution
Be careful not to soak with too much anhydrous ethanol, as it may leak inside the camera.Wiping can be done with tissues, etc., but since they produce a lot of lint, be sure to remove the dust thoroughly with a blower later.
【Camera lens mount】
On some cameras, TTL flash may not work correctly or an error message may be displayed on the camera side when communication with the electronic contacts of the lens is lost.
Even if you usually use the camera with one lens attached, if you think the light adjustment is strange, please try checking the lens mount part. Sometimes just detaching and reattaching it can fix it.
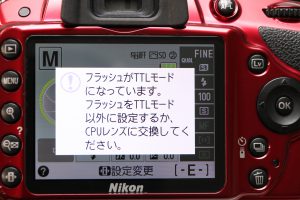
An example of when the lens and camera cannot communicate normally (in this case, the shutter will not release)
When it "suddenly" stops firing
When it suddenly stops firing, please check the following points.
【Batteries/Power supply related】
- If you feel the charging time has become longer or the flash has suddenly become unstable, please replace the batteries.
- If the power turns off relatively quickly after you start using it even though it should be fully charged, the batteries are likely degraded, so please replace them with new rechargeable batteries.
- If even one of the four batteries (or eight/two depending on the model) is degraded, the power may turn off quickly. If you can check the voltage after use with a charger or voltage checker, check the voltage of each battery; if you find any unevenness, replace all batteries with new ones.
【Settings changed without realizing】
- Settings like flash mode may have changed without you realizing it, so please check the settings.
If it still does not improve
If you have tried the above and it still does not work properly, please request a repair or contact us.
Repair/Inquiry Page
Repair/Inquiry Page
Q. What to do when NAS system signal range is poor
Because various devices exist within this 2.4GHz band, signals may be influenced or interfered with by other devices depending on your environment, which can sometimes lead to communication failures due to signal congestion.
In this article, we will talk about products in your daily life that use the 2.4GHz band, as well as methods to avoid such issues (though it is worth noting there is no perfect solution).
Originally, a license is required to transmit radio waves to prevent interference (as is the case with TV and radio stations). However, the 2.4GHz band, also known as the "ISM band," is a special frequency range that can be used freely without a license, provided that the equipment has obtained certification in accordance with radio laws.
First, let’s look at some common devices that use the 2.4GHz band.
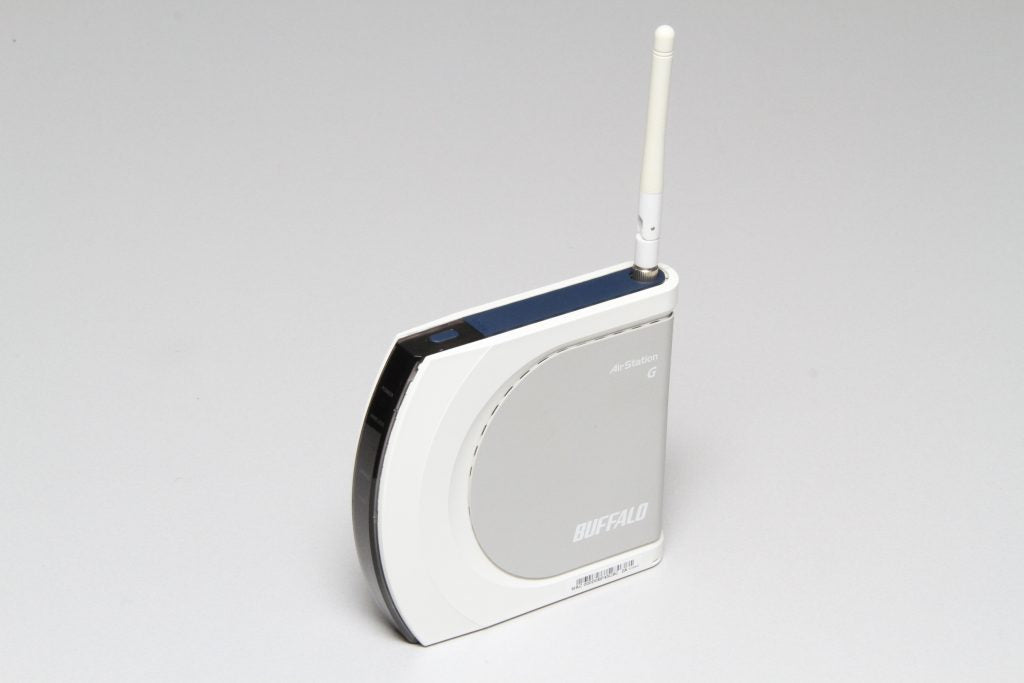
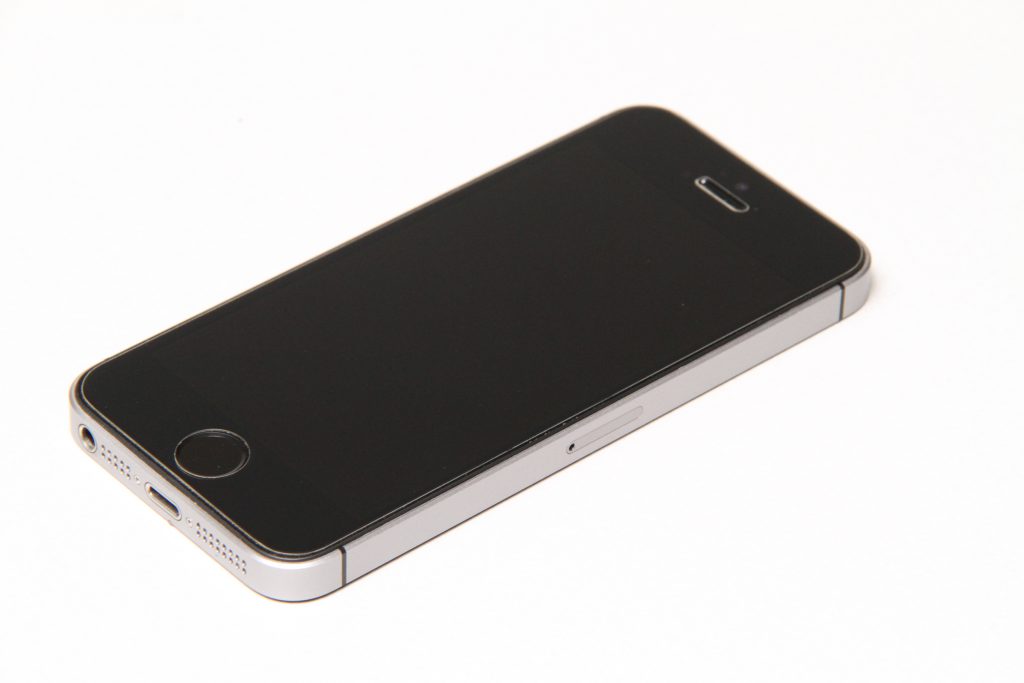 Wi-Fi (wireless LAN) used in PCs, smartphones, and pocket Wi-Fi devices is likely the main player in the 2.4GHz band today. You are probably using it, too.
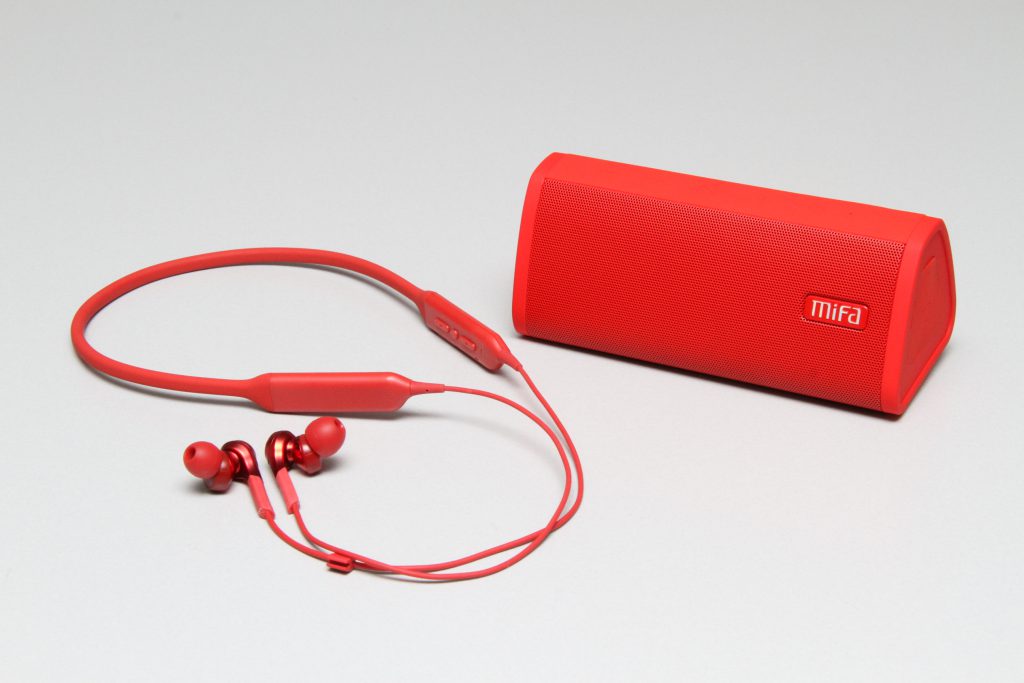 Bluetooth, used for wireless earphones and speakers, is also a standard that utilizes 2.4GHz radio waves.
As you can see, there are countless devices around us that use 2.4GHz radio waves.
In addition, more recent TV remote controls use 2.4GHz signals, as do cordless phone handsets, the emissions from a microwave oven while heating, and some professional wireless microphones and lighting fixtures. It is safe to assume that almost all "wireless" devices around you use this frequency band.
Considering this, it is somewhat inevitable that your equipment may be affected by the environment, not just our products.
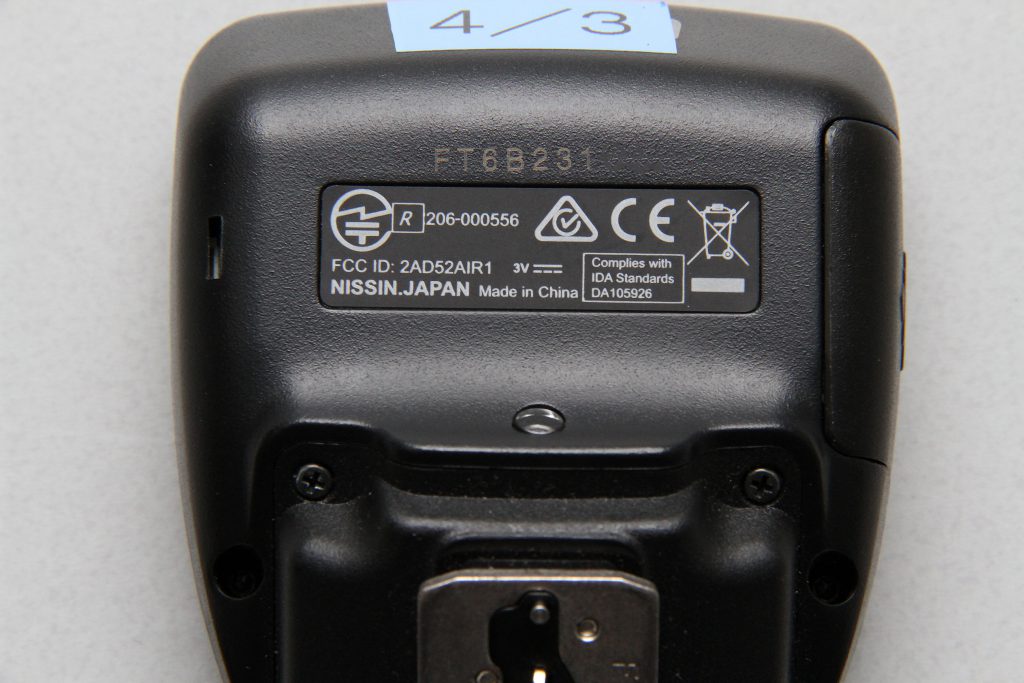 Furthermore, to legally use radio-emitting devices in Japan, the equipment itself must display a logo and certification number commonly known as the "Technical Conformity Mark" (Giteki mark).
This photo shows the Air1; on the left, you can see a logo with a 〒 symbol inside a circle. This is the Technical Conformity Mark. (All Nissin flash products have obtained this mark.)
Overseas-spec products lack this logo and may emit stronger radio waves than permitted in Japan or use unauthorized frequency bands. There have been cases where certified equipment fails to function properly because it is being obstructed by uncertified devices.
If you are using our NAS system equipment and find that reception is poor even when there are no other wireless devices nearby that should cause interference, please try the following:
Note: The catalog range is 30m line-of-sight for the Air1 and 100m line-of-sight for the Air10s. (These are not guaranteed values and will vary depending on conditions.)(1) Is there something blocking the radio waves between the commander and the flash?Because 2.4GHz radio waves have high directivity, they do not easily travel around obstacles. Materials such as metal or reinforced concrete block radio waves, which can significantly reduce communication distance.
Additionally, because radio waves also reach the receiver by reflecting off walls, floors, and ceilings, the reachable distance can change drastically depending on the structure of the space, as waves may reinforce or cancel each other out.
If the flash does not trigger correctly, try changing your position or the height of the equipment.
(2) Are there devices nearby that could be causing interference?If you place the NAS commander too close to a pocket Wi-Fi, smartphone, Bluetooth device, or a wireless tethering system for a camera, signal interference may occur, making communication unstable.
Try turning off unnecessary devices or ensure that radio-emitting devices are not kept too close to each other. (Moving them at least 1 meter apart is often said to improve the situation significantly.)
(3) Is the commander's battery level sufficient?Although it is a basic point, it is often overlooked during a shoot: when battery levels are low, communication range can decrease, and in rare cases, the device may exhibit unexpected behavior.
In particular, because the Air10s and Air1 use two AAA batteries to keep their size compact, battery consumption can be faster than expected. We recommend using high-capacity NiMH rechargeable batteries (such as eneloop pro) or keeping spare batteries on hand.
(4) Try changing the communication channel of the NAS system.The NAS system allows for a total of 8 channels. Unlike channel settings in other companies' products used for grouping, these channels are meant to be changed to "avoid issues during congestion or when communication is unstable."
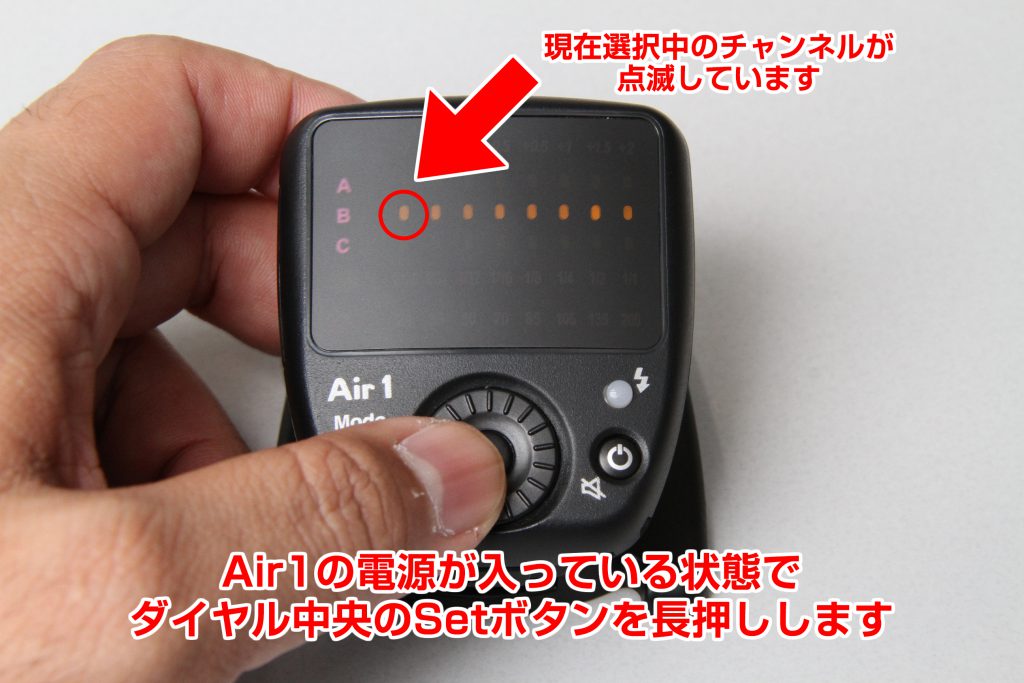
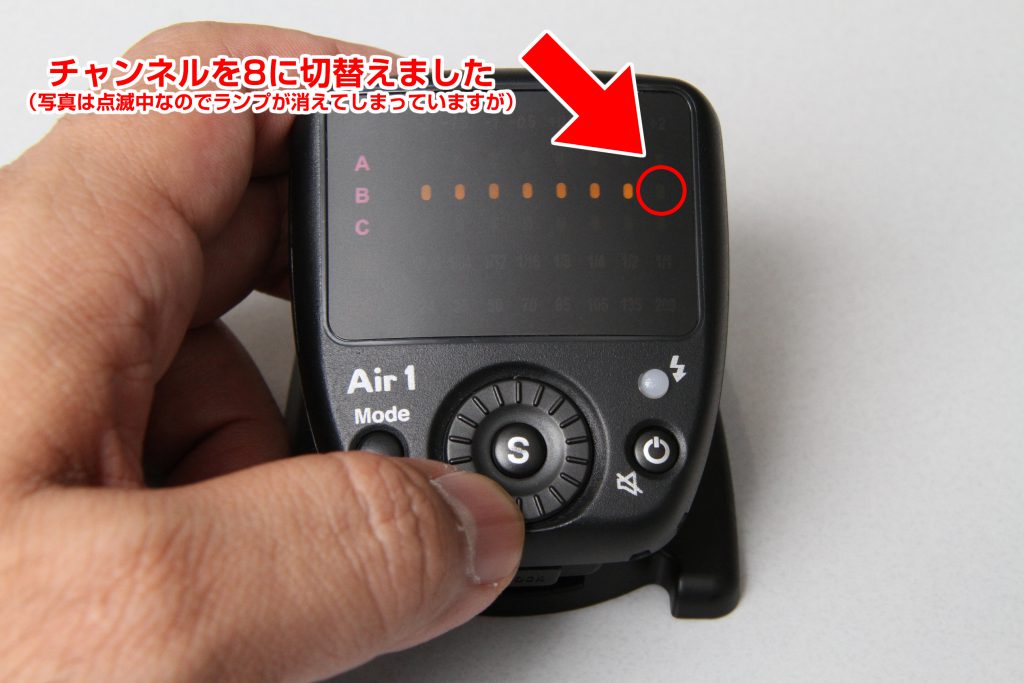 For the Air1, follow the operations shown above. Channels 1 and 8 at the ends of the spectrum seem less susceptible to Wi-Fi interference.
For the Air10s, if you press and hold the "Channel" indicator on the control panel dial, you can select the channel using the dial.
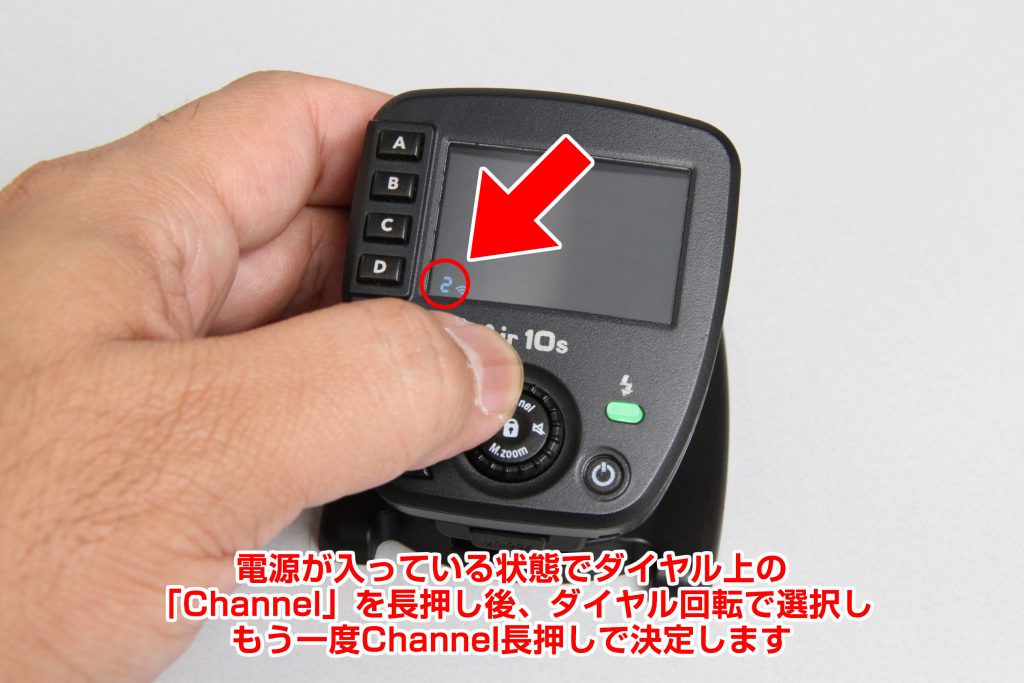 For the Air10s, long-pressing "Channel" on the dial allows you to change it using the dial. (Channel 1 of the Air10s can only be used with the MG10.)
(5) Try changing the orientation of the commander/receiver antennas.While the effect is minor, orienting the antennas of the devices to face each other may slightly improve communication.
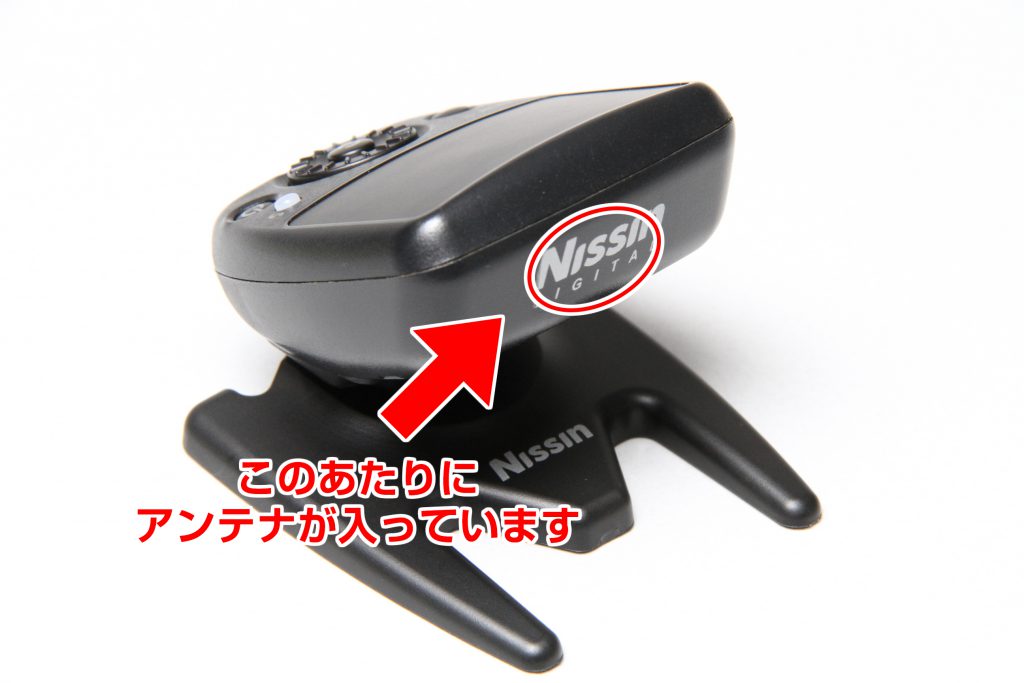
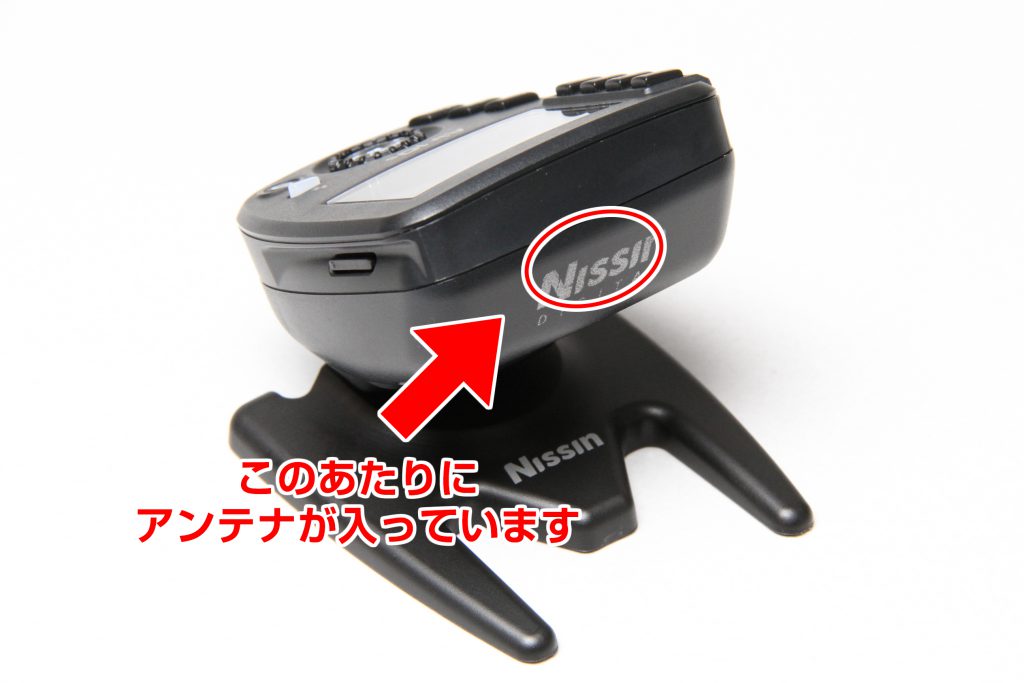 The antennas for the Air1 and Air10s are located behind the Nissin logo on the front.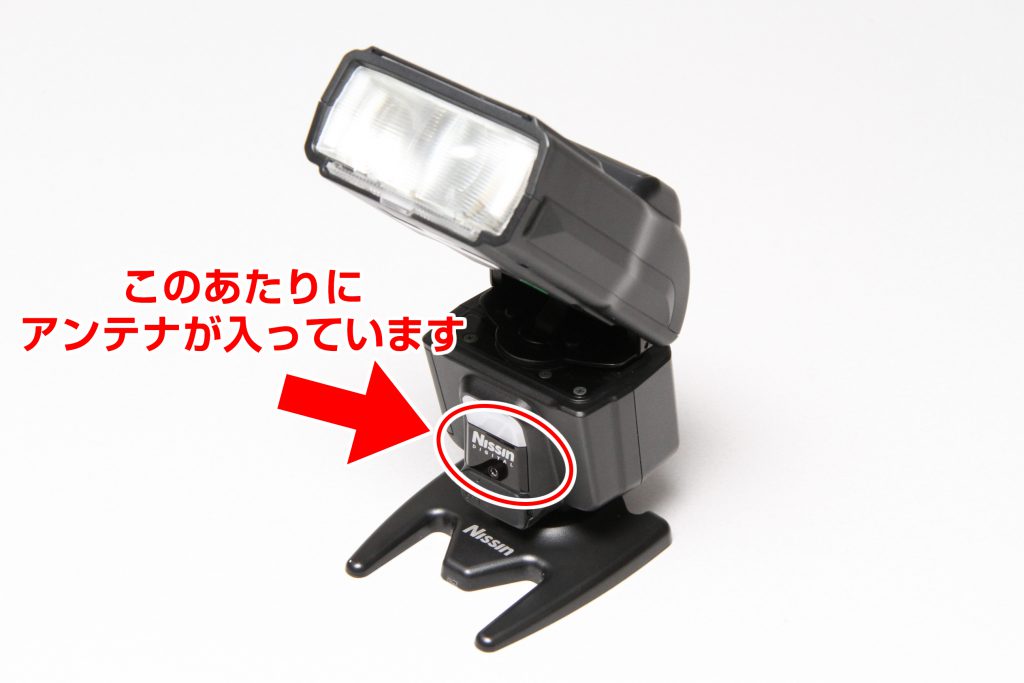
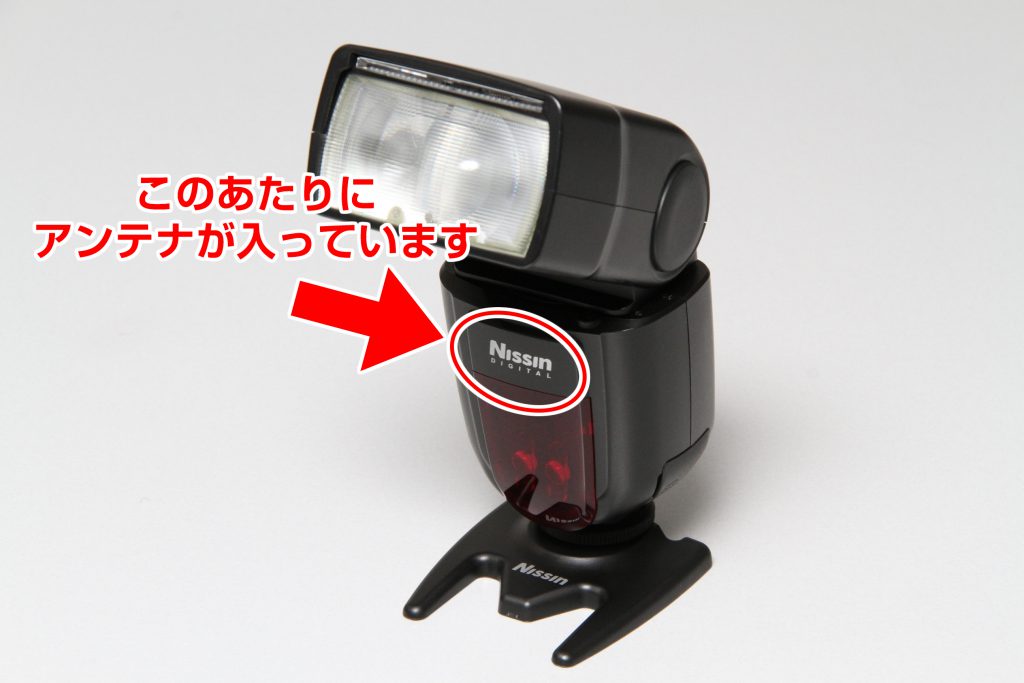 The antennas for the i60A and Di700A are located behind the Nissin logo on the front of the unit.
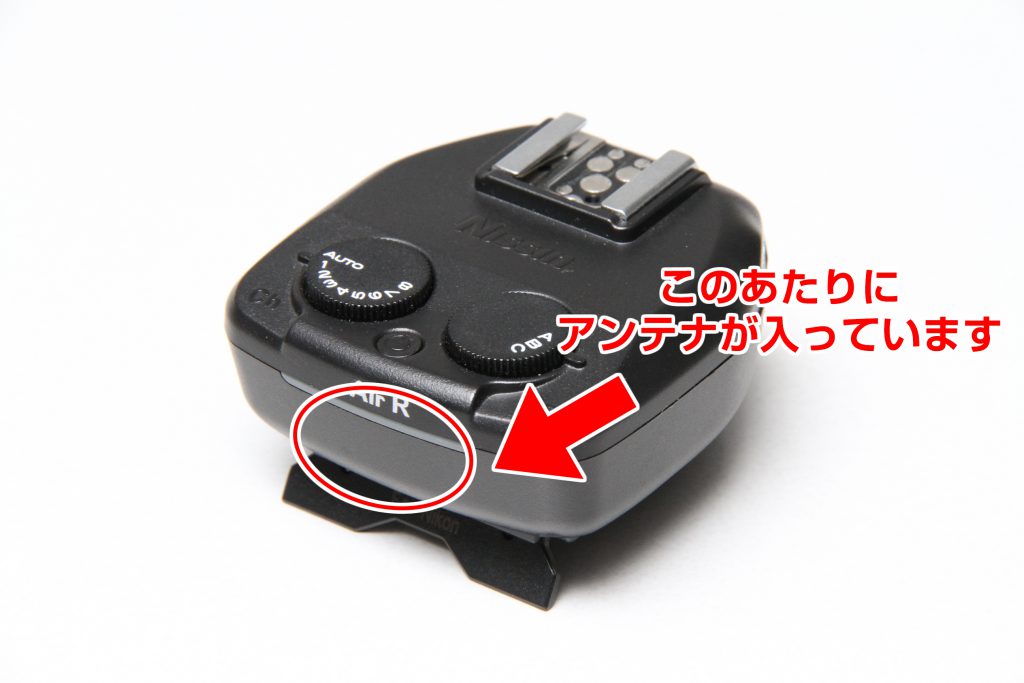 The AirR antenna is located below the AirR logo on the front.
If the antenna is hidden by equipment such as a softbox, rotating the flash to face the camera direction may improve the signal.
Nissin offers two Air commanders: the Air1, which is affordable and simple to operate, and the Air10s, which is the high-performance, multifunctional core of the NAS system.
For advanced shooting or when you require stability in environments where radio conditions are poor even at close range, please consider using the Air10s.
【Air10s Product Information】
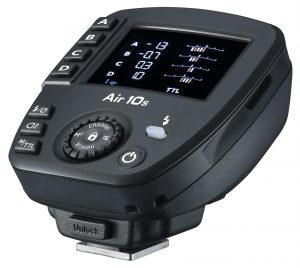 Commander Air10s Product Page【Air1 Product Information】
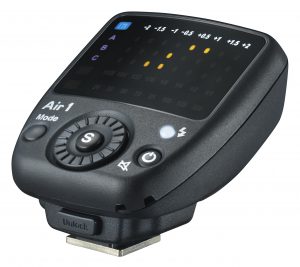 Air1 Frequently Asked Questions (FAQ)
Q. Is High-Speed Sync (FP Flash/HSS) supported?
Applicable models: All flash and commander models
Setting and switching methods vary by model, so please refer to the manual for your specific unit.
Note: When using High-Speed Sync with the NAS system and the AirR, the flash attached to the AirR must also be a High-Speed Sync compatible model. If a non-compatible model is attached, it will not fire correctly.
Q. What are SD/SF modes (Slave modes)?
Applicable models: All
While slave mode is similar to wireless TTL in that the "flash triggers wirelessly," it does not perform remote flash control through complex communication with a master unit (transmitter/commander). Instead, it performs a simple operation: "the flash fires in synchronization when it detects another flash firing nearby." (Other companies may call this a photocell mode.)
Because it simply reacts to light, it has the advantage of being able to synchronize with studio flashes or flashes from other manufacturers. However, there are limitations: you must set the flash output manually in advance; it may be less reliable than radio-based systems since it is light-dependent; and it does not support TTL automatic light control or High-Speed Sync.
SD mode (Slave Digital) is a "pre-flash cancellation mode" compatible with TTL flashes. It does not trigger on the first flash (pre-flash) and treats the second flash as the main flash, triggering accordingly. (It may not sync with units that emit more than two pre-flashes or those with an extremely short interval between the pre-flash and main flash.)
SF mode (Slave Film) is an "instant sync mode" compatible with manual flashes. This is effective when using this unit as an auxiliary light in combination with large studio strobes.
*1 The i60A and Di700A are equipped with both the radio wireless TTL function (NAS) and camera-manufacturer-compatible optical wireless TTL functions. The i40 only supports optical wireless TTL. The Fujifilm version does not feature optical wireless TTL.
Q. It won't fire even though the green light is on
Applicable models: All flash and commander models
Especially when attaching Olympus/Panasonic (Four Thirds) models to Olympus (OM SYSTEM) or Panasonic (LUMIX) cameras, try pressing the "Unlock" button on the mounting foot while inserting it.2. If it does not fire even when you press the pilot lamp on the flash, please request a repair.3. Please clean the hot shoe.
Q. The flash fires multiple times before the shutter releases
Applicable models: All flash and commander models
Q. The NAS system "channel" and how to change it
However, if you have used NAS equipment, you might be thinking, "Wait, aren't there channel settings?"
In fact, because there are various devices in the 2.4GHz band, radio interference can occur in some cases, so the NAS system allows you to change channel settings to avoid this.
Normally, you do not need to change these settings, but we will introduce how to do so just in case.
【For the Air1】
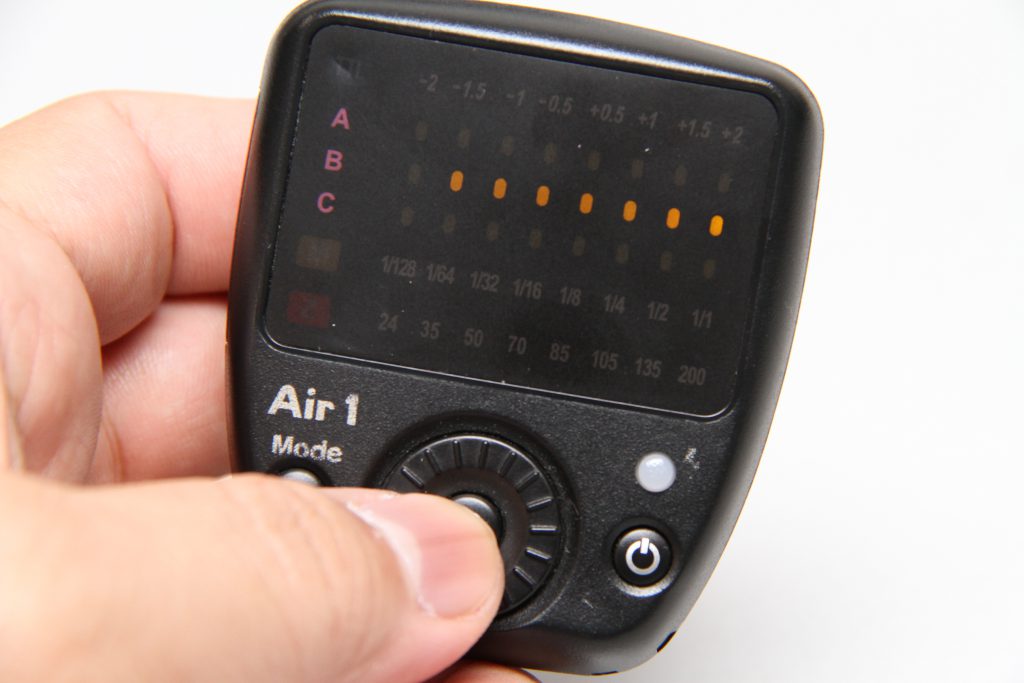 With the Air1, if you press and hold the Set button in the center of the dial while the power is on, all LEDs in group B will light up, with one of them blinking. This is the channel setting screen.
The 8 LEDs from the left represent channels 1 through 8. (In the photo, channel 1 is selected, so it appears dark because it is blinking.)
Rotate the dial to select the desired channel, and press the Set button to confirm.
Note: In the case of the Di700A used in combination, the flash unit will automatically sync when you set it on the Air1 side.
Also, please note that channel 1 on the Air1 cannot be used with the MG8, MG10, or MG80 Pro.
【For the Air10s and MG80 Pro】
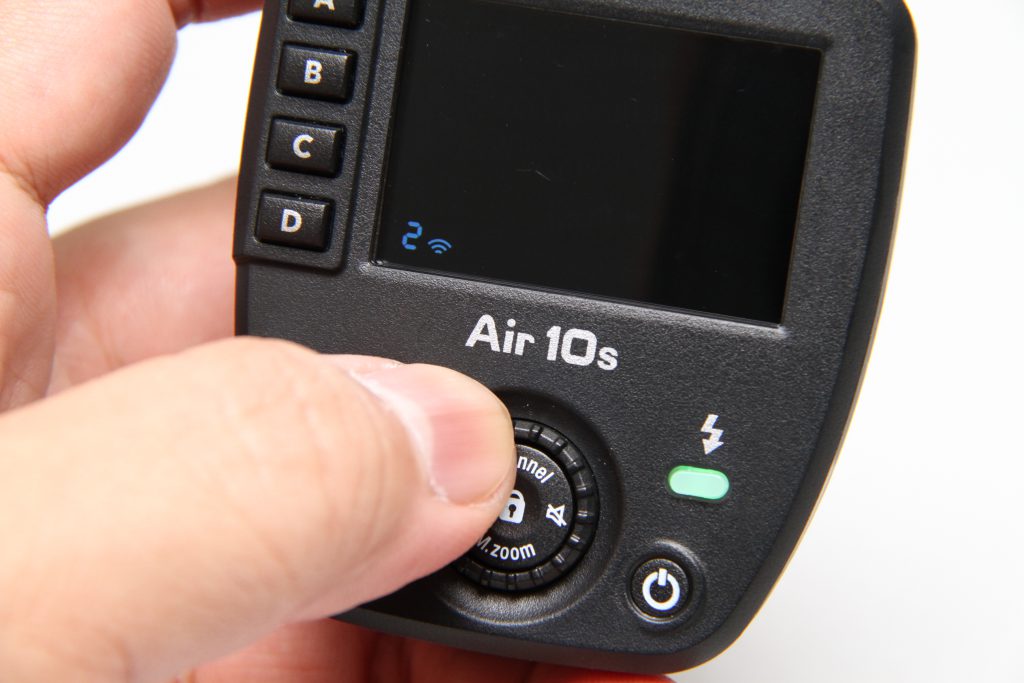 (With the MG80 Pro in commander mode) While the power is on, press and hold the "Channel" area on the dial. The display will switch to show only the blue channel number, and you can change the channel by rotating the dial.
Once you have decided on the channel, press and hold the "Channel" area on the dial again to confirm.
Note: Please be aware that channel 1 on the Air10s and MG80 Pro (commander mode) cannot be used with the Di700A, i60A, or AirR. (As of August 2019)
*This is why the default channel upon purchase or resetting is 2.
【Settings on the flash side】
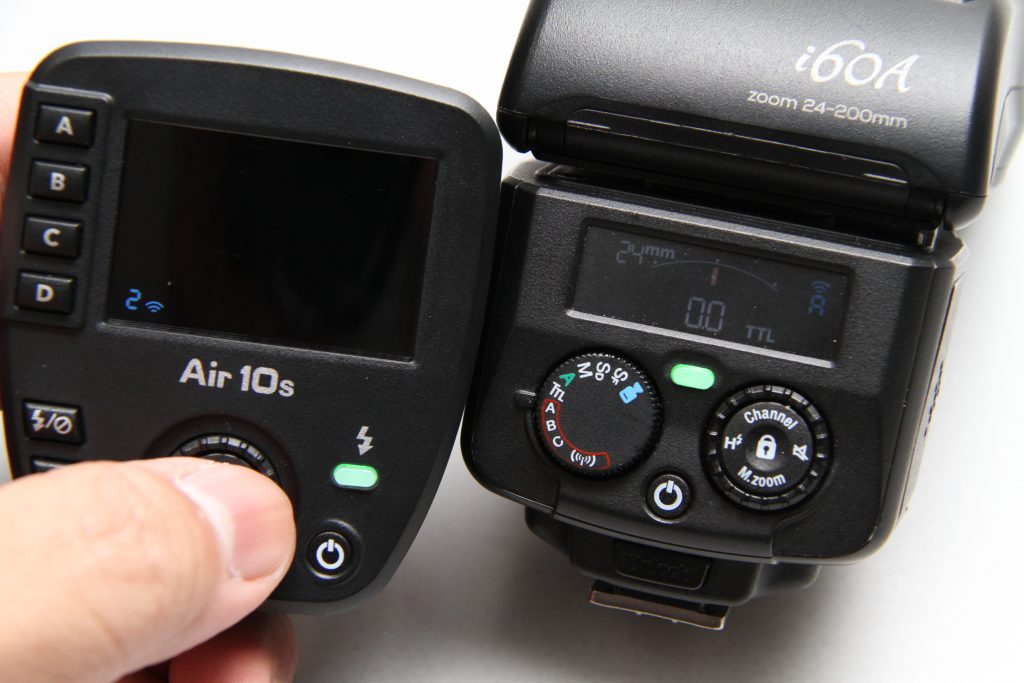 The i60A and MG80 Pro (slave mode) have an "A" (Auto) setting in addition to channels 1–8. In the "A" position, the unit will automatically match the channel setting on the Air unit, so please use this position normally.
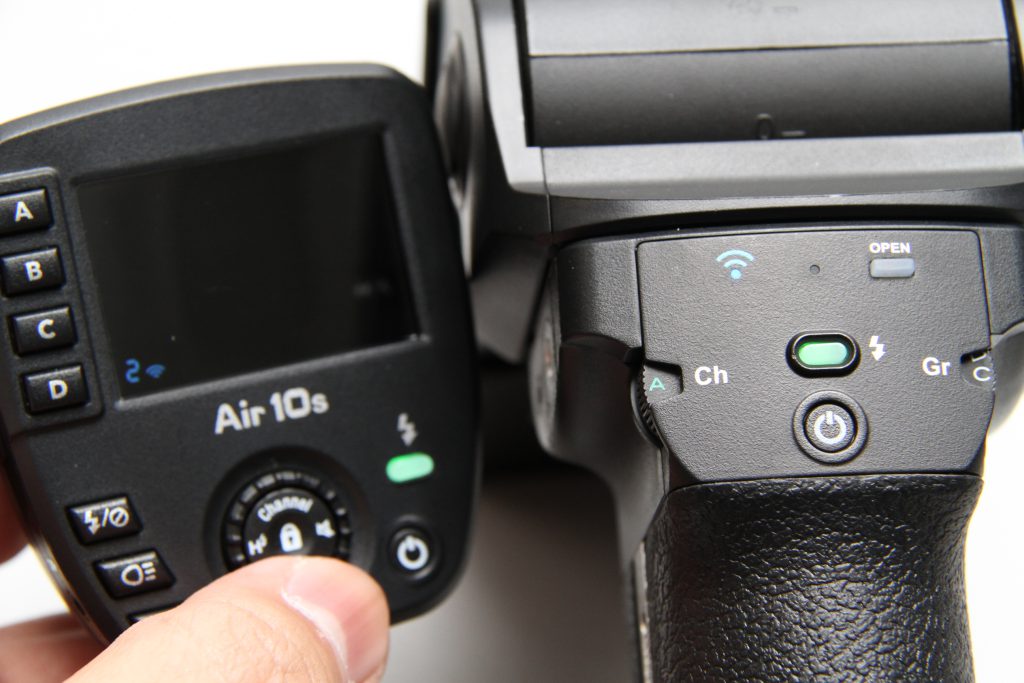 For the MG10 and MG8, please also use the "A" (Auto) position normally.
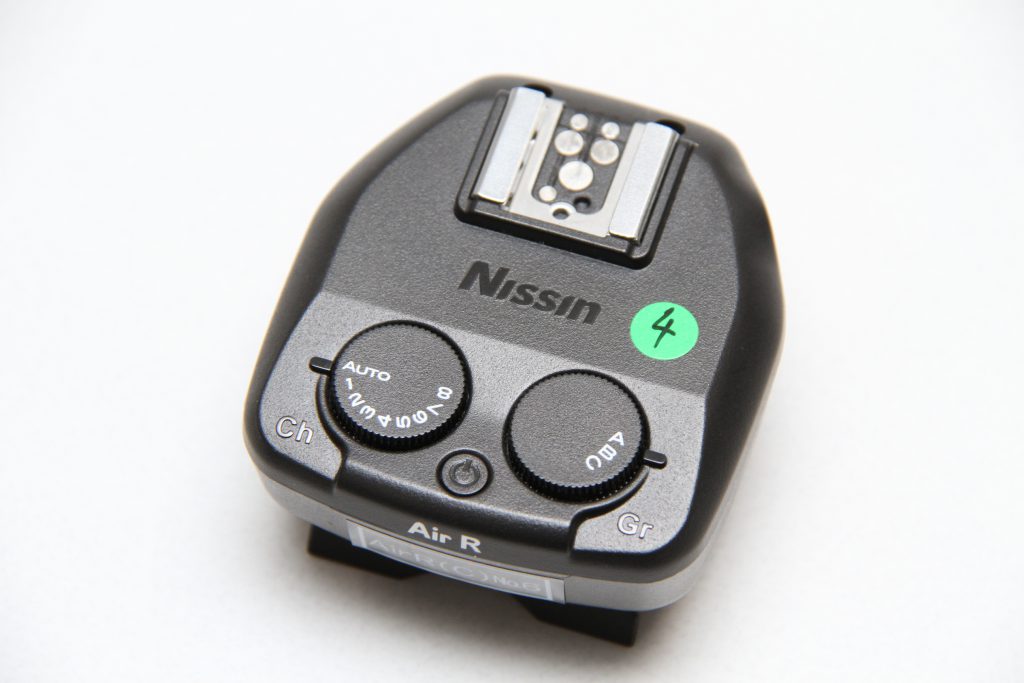 The AirR also has an AUTO position. Please keep it in this position for normal use.
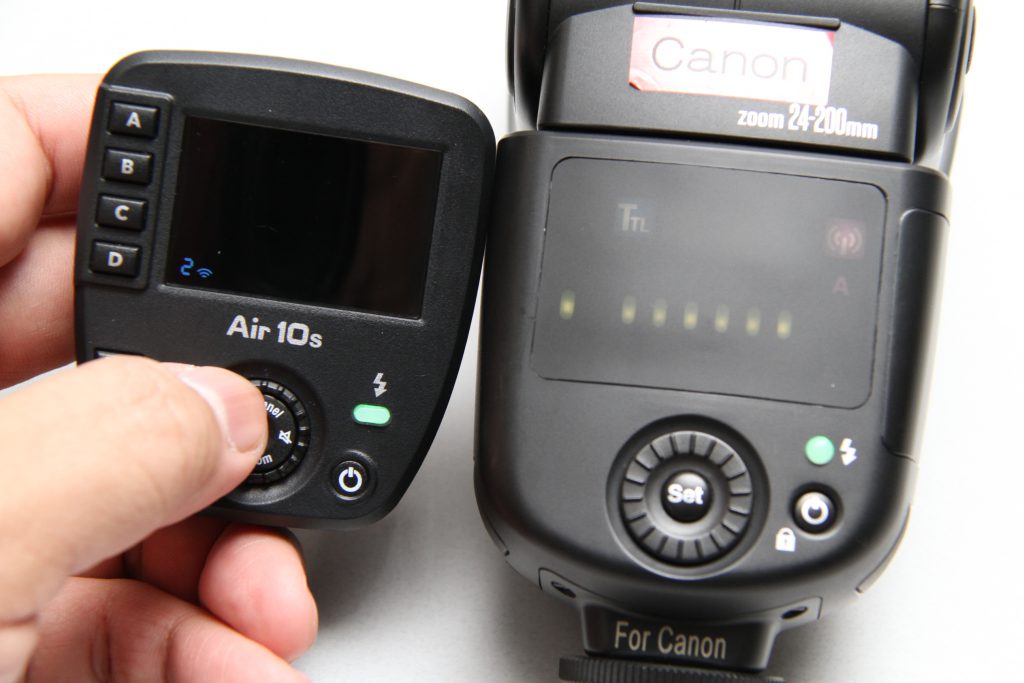 The Di700A does not have a manual channel setting item and only supports auto-setting from the commander side.
As described, this differs slightly from the channel concept of typical wireless flash equipment; the channel setting can be changed solely for the purpose of "preventing signal interference."
Because of this, if you change the commander's channel while the flash (receiver) is powered off or in a poor communication state, the flash will not receive the "Changed to channel ○" signal, causing the commander and flash to be on different channels and unable to communicate.
If this happens, manually set the flash (receiver) channel to match the commander (except for the Di700A) or perform the pairing operation again. (We recommend always manually matching channels when in OPEN mode.)
Additionally, because Air10s and Di700A/i60A/AirR channel 1s are not compatible, if you set the Air10s channel to 1 while the Di700A/i60A/AirR are set to channel A, they will automatically switch to channel 1, but they will immediately be unable to receive any signals from the Air10s. If this happens, change the Air10s channel to something other than 1, then manually match the flashes to the same channel as the Air10s (except for Di700A) or perform the pairing operation again.
Q. Troubleshooting when the flash doesn't fire correctly - Off-Camera (Remote Control)
This is troubleshooting for when the flash does not trigger correctly when the commander is mounted on the camera.
"Doesn't fire from the start"
"Suddenly stopped firing/Firing is unstable"
We will explain how to deal with these symptoms.
Click here for "Troubleshooting when the flash doesn't fire correctly - On-Camera."
When it does not fire from the start
【Check the hot shoe attachment】
- Insert the commander's mounting foot firmly all the way into the shoe.
- If you press the Unlock button while inserting, it may allow for a deeper connection.
【Check the commander settings】
The flash may not fire if the settings were unintentionally changed from the last use. In that case, perform the following:
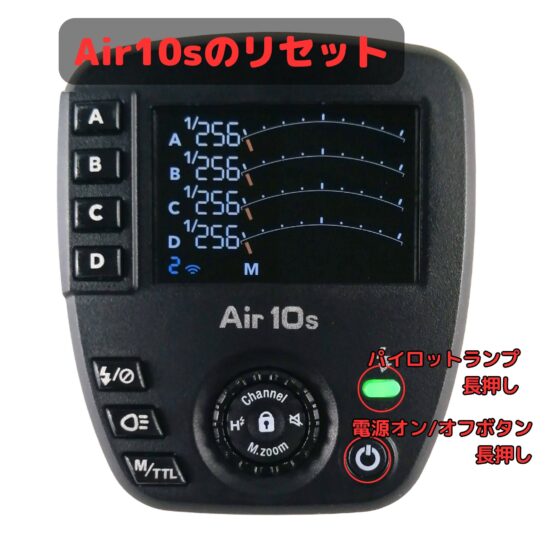
1. Commander Reset
Press and hold the pilot lamp or the power on/off button.
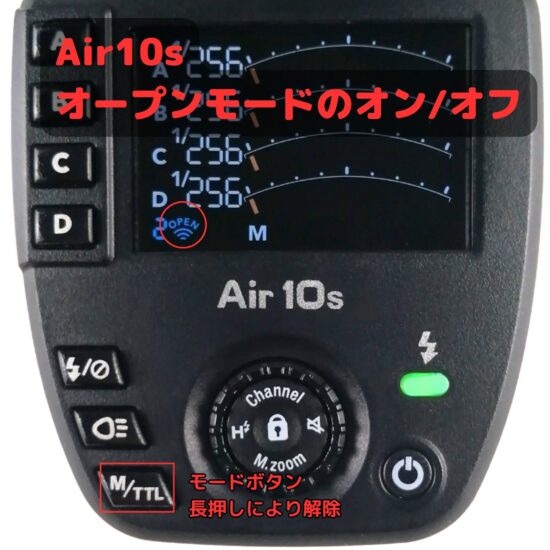
2. Disable Open Mode
Open mode, indicated by "OPEN" in the bottom left of the LCD screen, is not compatible with standard pairing mode. Press and hold the mode button ("M/TTL") to disable Open mode. *If you are using Open mode, ensure the flash is also set to Open mode and use them accordingly.
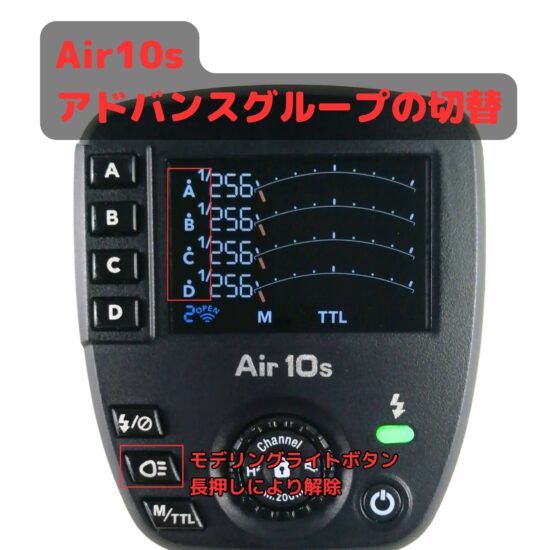
3. Switching Advanced Groups
If a dot (・) appears above the letter in the group display, it is in Advanced Group mode. Press and hold the modeling light button to switch back to the basic group. *If you are intentionally using Advanced Groups, you may leave it as is.
4. Toggle "Flash Off" for groups
If three lines "---" appear to the right of the group display on the LCD, flash for that group is disabled. In that case, while the group is blinking, press the group on/off button to re-enable it.
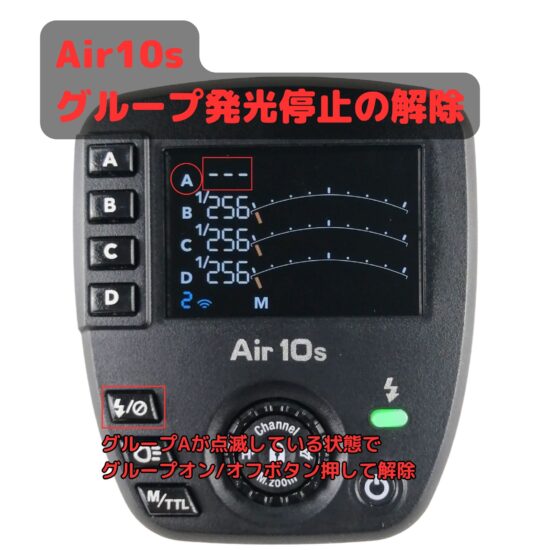
When it "suddenly" stops firing or becomes unstable
【Battery/Power issues】
- If the low battery icon appears on the flash screen or you feel that charging time has become longer, replace the flash batteries.
- If the commander screen displays abnormal information or you feel the firing has suddenly become unstable, replace the commander batteries.
- If firing remains unstable after battery replacement, perform a reset on both the commander and the flash.
- If the charge drains quickly even though the rechargeable batteries should be full, the batteries have likely degraded. Please replace all batteries with new ones.
【Settings changed without notice】
- Settings like mode, group, or channel might have been changed accidentally, so please check all settings.
【Radio interference】
- Firing may become unstable due to the influence of other wireless devices using the 2.4GHz band, so try changing the commander's channel.
If there is interference, we recommend setting the channel on the flash side to match the commander manually rather than using "A" (Auto). (Except for the Di700A, which cannot set channels manually.)
Q. I cannot change the zoom (irradiation angle)
Auto-zoom does not function (Manual zoom works)
When auto-zoom (the feature that automatically adjusts the flash's angle based on the lens's focal length) does not work, consider the following causes:-
The flash head is not facing forward.Nissin flashes are designed so that auto-zoom only functions when the flash head is pointed forward.
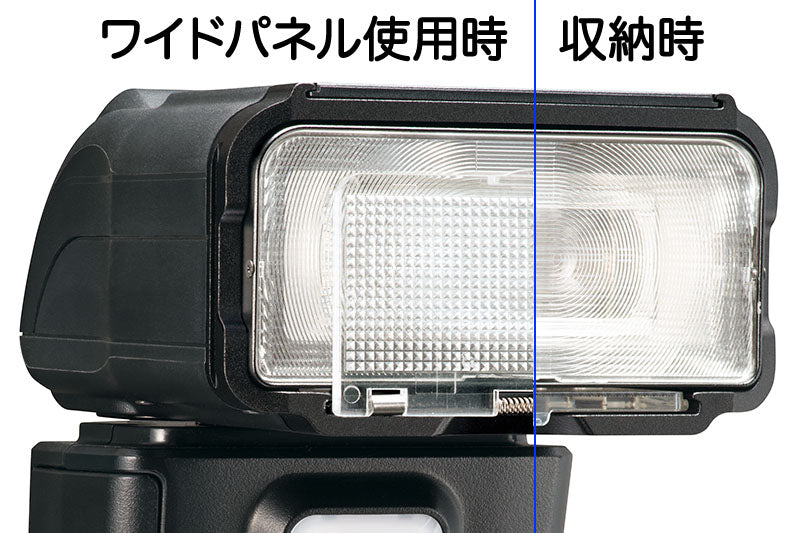
When set to auto-zoom, if the flash head is pointed even slightly to the side or up, it will be set to the 50mm position. (Except when the wide panel is pulled out.) -
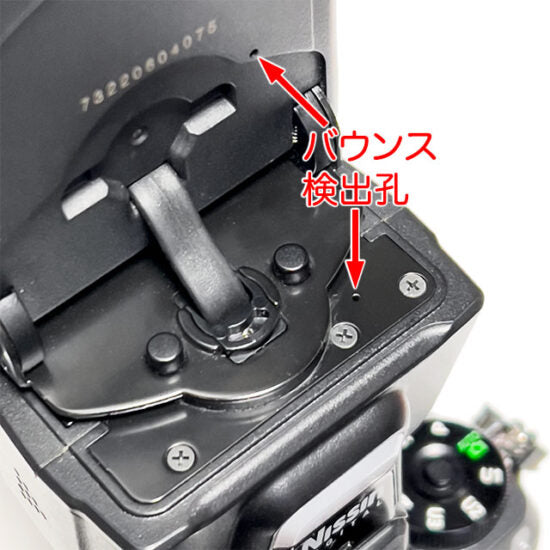
The bounce mechanism is blocked by tape or dust buildup.An optical sensor is built into the bounce mechanism, constantly detecting whether the flash head is facing forward.
If you cover the sensor (the bounce detection hole) with tape, the device assumes the flash head is not facing forward, and the auto-zoom function will be disabled.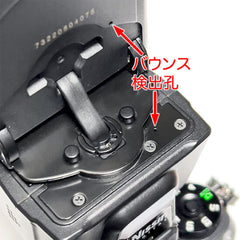
-
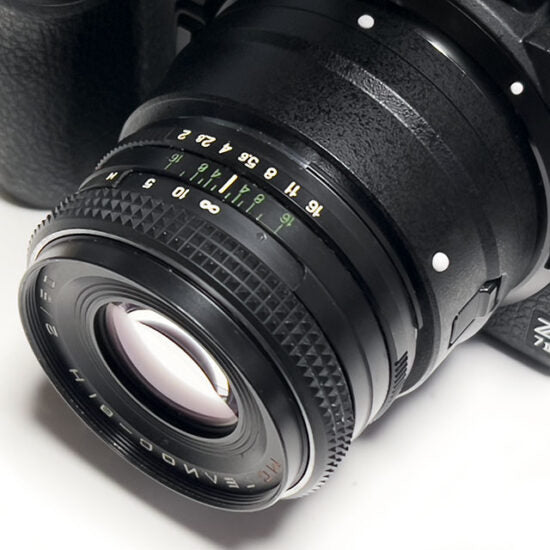
The lens focal length information is not being transmitted to the camera.When using old lenses or a mount adapter without electronic contacts, if the lens focal length information is not transmitted to the camera, the auto-zoom function will be disabled and fixed to the 50mm position (25mm for Olympus/Panasonic models). In this case, please set the angle manually.
Neither auto-zoom nor manual zoom functions
When neither auto nor manual zoom works, consider the following:-
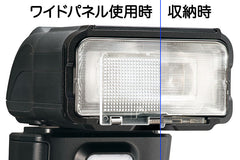
The wide panel is pulled out (Except for MG8, MG10, and MG80 Pro).When the wide panel is pulled out, the zoom mechanism moves to and locks at the widest angle. Please store the wide panel if you wish to change the irradiation angle.
- The group controlled on the commander differs from the group set on the flash.If the group you are controlling on the commander is different from the group set on the flash, the settings will not be reflected on the flash. Please verify the groups (A–D and A'–D').
- The zoom cover movement is obstructed (MG8, MG10, MG60, MG80 Pro).If the zoom cover is attached upside down or if foreign objects are wedged between the zoom cover and the body, remove the object and ensure the cover is attached in the correct orientation.
- The flash attached to the AirR is set to manual zoom.If the flash attached to the AirR is set to manual zoom, the irradiation angle cannot be controlled from the Air10s. Even if you want to set the angle manually, ensure the flash attached to the AirR is set to auto-zoom.