Basic lighting method with kit
When lighting, first set up the flash in the “basic position” and then make “fine adjustments” depending on the features of the person. Then move on to “Variations”.
Basic Position
Fine Adjustments
Variations
Now, we will explain each of them in detail.
[Basic Position]
| 45degree diagonal of the subject, higher than the line of sight |
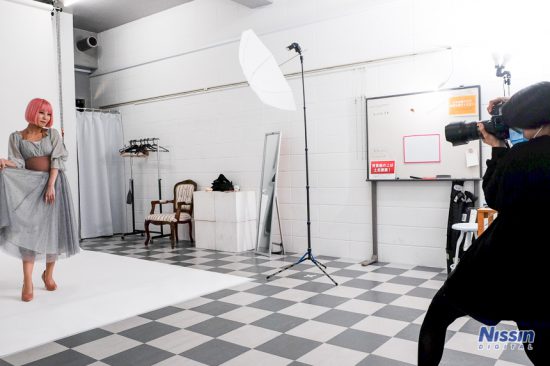
“Diagonal 45degree” … It means a position about 45degree diagonally to the right or left from the subject to the photographer.
“Higher than the line of sight” … Set the height of the flash higher than the line of sight when looking at the flash from the subject.
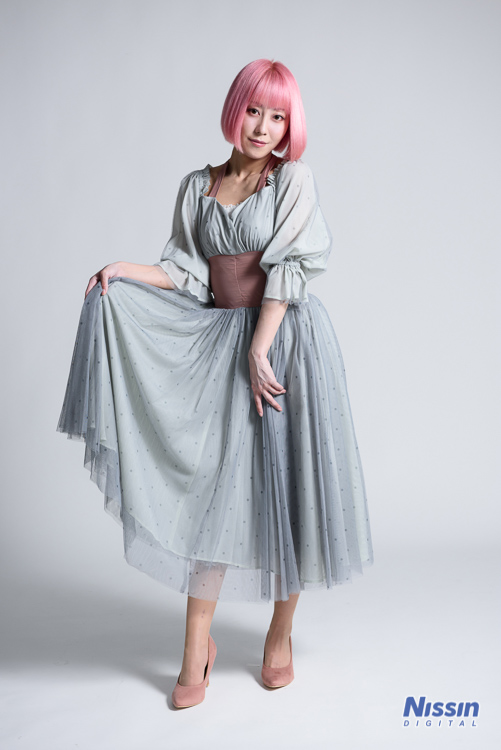
It is a lighting with a three-dimensional effect with moderate shadows while the light turns beautifully. The shadows express the texture of the clothes, giving a luxurious look. It is easy to get a natural impression by shining light from a position higher than the line of sight.
Basic lighting with a moderate three-dimensional effect. If you get lost in writing, it’s a good idea to start from this basic position.
[Fine Adjustments]
The basic position is standard lighting with few hits and misses, but it’s not all-purpose.
The appropriate way of shining light depends on the image of the subject, the condition of the skin, facial features such as unevenness and the size of parts, and the type of clothes you are wearing. It may be necessary to make fine adjustments from the basic position, so let’s see how to make adjustments.
Image… “Cool” looks good on the side, and “Cute” looks good on the front.
When you want to take a cool image, such as when the subject is a man, place it in a position where the stereoscopic effect is emphasized (closer to the side). If you want to create a cute or soft image, such as for women and children, you often adjust the position closer to the front without overemphasizing the three-dimensional effect.
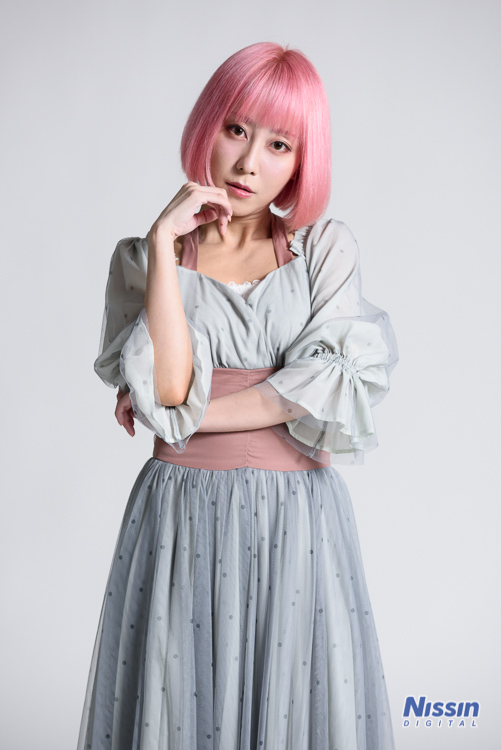
Skin… If you are worried about wrinkles or rough skin, move closer to the front.
Lighting from closer to the front reduces the appearance of wrinkles and rough skin, and makes the skin look more beautiful.
Unevenness of the face and the size of the parts… Make sure that the areas of concern are inconspicuous.
Adjust the position so that the areas of concern such as the unevenness of the face and the size of the parts are not emphasized. When shadows are added, unevenness is emphasized, so if you want to soften the three-dimensional effect, move it closer to the front or lower the height of the light source. On the other hand, if you want to create a three-dimensional effect, move it closer to the side or raise the height of the light source.
Shape and texture of the costume… If you want to emphasize the shape and texture of the costume, place it closer to the side.
If you want to mainly express the shape and texture of clothes, fine-tune the angle of light so that it does not differ significantly from the appearance. If you want to express the texture of clothes, it is better to adjust the flash to a position closer to the side.
| Note: For single-light lighting, decide clearly what your priorities are. The above example is for reference only. Whether to use a flash on the side or in front of the subject is ultimately up to the photographer. |
[Variations]
Now that you’ve adjusted the basic positions, it’s time to shoot some variations. There are three basic patterns and their combinations for variations.
Concentric circles… Move the strobe concentrically around the subject.
-When moving concentrically, there is almost no need to change the flash output because the distance to the subject is constant.
-Adjust the flash so that it faces the subject.
-The closer it is to the front, the younger it is, the closer it is to the side, the more mature it is, and the closer it is to the rear, the more shadowy it gives a dramatic impression.
Caution: When installing from the side to the rear, the TTL mode cannot be used because the strobe light does not affect the exposure so much. Adjust the amount of light with Manual mode.
Up and down… Expand and contract the light stand to move the flash up and down.
If you want to make it higher, make the light intensity higher. To lower the flash, lower the light intensity.
Adjust the vertical angle of the flash so that the light emitting part faces the subject.
Distance… Move the flash closer or further away from the subject.
If you want to get closer to your subject, reduce the light intensity. If you want to move away from the subject, increase the light intensity.
Adjust the vertical angle of the strobe so that the light emitting part faces the subject.
Now let’s take a look at the variation in detail on the next page.