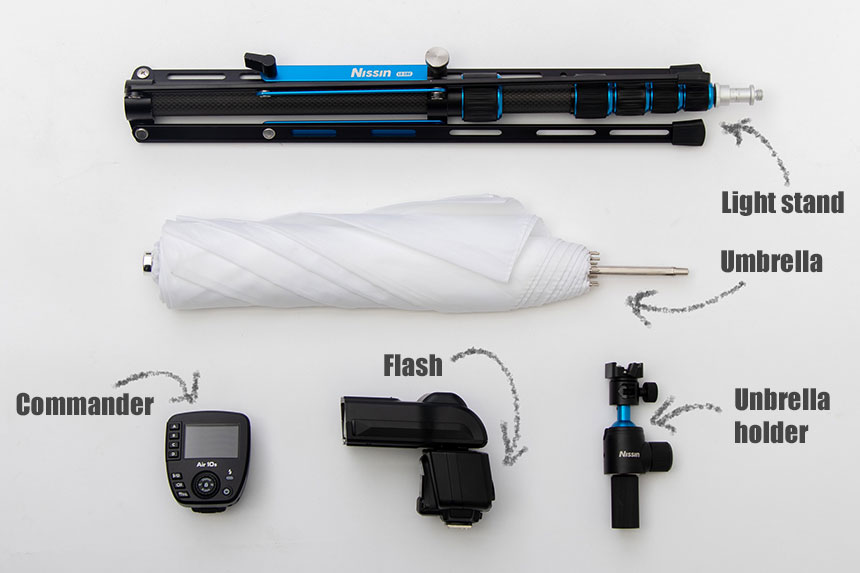
The Portable Lighting Kit is an introductory kit to start “off-camera flash lighting” by remotely firing a flash away from the camera. The kit consists of five components: flash (i60A), commander (Air10s), light stand (LS-50C), umbrella (CU-90T) and umbrella holder (FT-01).
If you already have a flash (i60A), all you need is a commander, stand, umbrella, and umbrella holder to start “off-camera flash lighting.”
Assembly and operation of the kit
| (1) Assembly ↓ (2) Paring ↓ (3) Group setting (Group A) ↓ (4) Commander operation |
First, we will explain how to assemble the kit.
(1) Assembly
- Insert batteries into the flash and commander.
- Set up the “Light Stand” and attach the “Umbrella Holder”
- Attach the flash and umbrella to the “Umbrella Holder”
- Attach the “Commander” to the camera.
(2) Paring
- Next, pair the flash with the commander. With the flash turned off, press and hold the “Power ON/OFF button” and the “Operation lock button” at the same time, the pilot lamp will blink yellow and a “beep…” sound will start.

- Next, if you press and hold the “Power ON / OFF button” and “Operation lock button” at the same time with the commander turned off, the pilot lamp will blink yellow.
- When you remove your finger from the commander, the flash will stop beeping and the flash and commander will start up, completing the pairing.
| Note: Set “Group Setting” to group “A” for a single flash, and set it to “B” for a second flash for separate AB remote control. |
(3) Group setting
To set the flash “i60A” in the “A” group, turn the mode dial and select “A” in the red box.
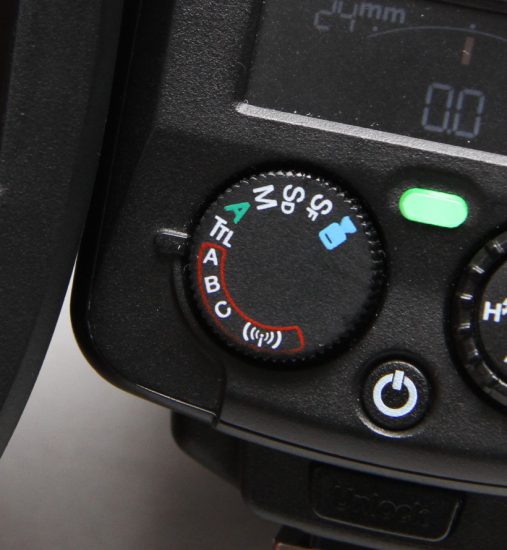
| Note: Set “Group Setting” to group “A” for a single flash, and set it to “B” for a second flash for separate AB remote control. |
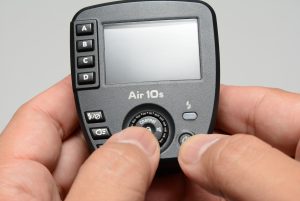
(4) Commander operation
| “TTL” compensation and storage of light intensity ↓ Adjust with “M” |
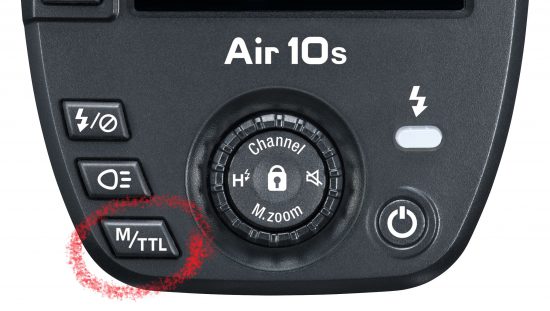
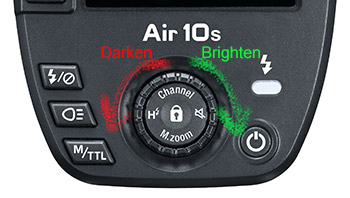
- Set the flash to “TTL” (automatic light level control) using the “M/TTL” button on the lower left. Since we are remotely controlling the Group A flash, adjust the scale on the right side of A on the commander. The center of the scale is the proper light intensity “0.0” position. Turn the center dial to change the light intensity by 0.3EV.
-
Turn the dial clockwise to lighten the exposure of your subject, or counterclockwise to darken it. This adjustment is called “exposure compensation”
-
When the brightness is just right, then press “M / TTL” to switch to “M” (manual light intensity adjustment).
-
When you switch to “M”, the amount of light used for TTL compensation will be stored in the memory (“TTL memory“).
-
As with TTL, in “M” mode, turning the dial clockwise makes it brighter, and turning it counterclockwise makes it darker.
| Note: If you adjust with “M” from the beginning, it will take more steps to get the right amount of light, so the above method is recommended for beginners. Once you get used to it, “M” can be adjusted more quickly. |
Now that you know how to adjust the amount of light, let’s actually practice portrait lighting.