![[MG10/MG8] Modification method of “conversion of bracket to Arca-Swiss”](https://www.nissin-japan.com/wp/wp-content/uploads/2023/03/007d561049595470a5f40aa5e9245e17.png)
* Please modify the product at your own risk.
* Please note that we are not responsible for any malfunctions or damage to the product that may result from modifications.
Introduction
We have received the following comments from customers using MG10 and MG8.
- The bracket attached to the camera sometimes rotates.
- I want to attach and detach the bracket more easily.
- When I attach the bracket, it is not stable when using a tripod.
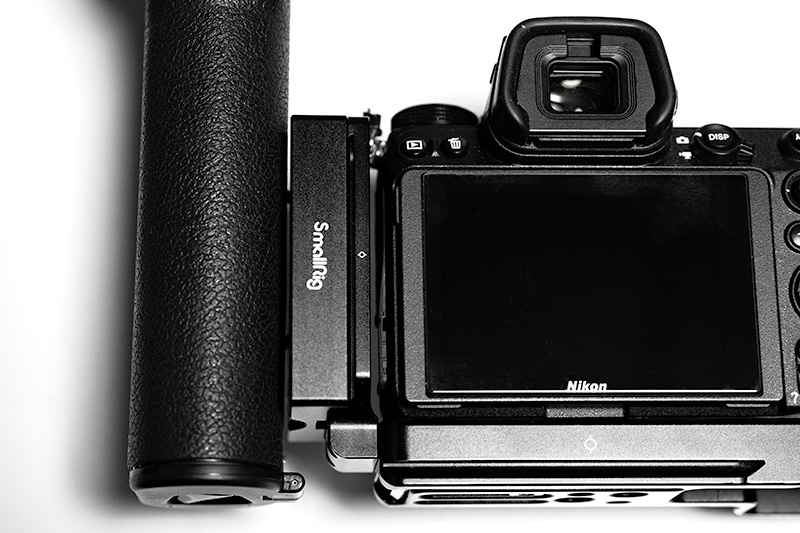
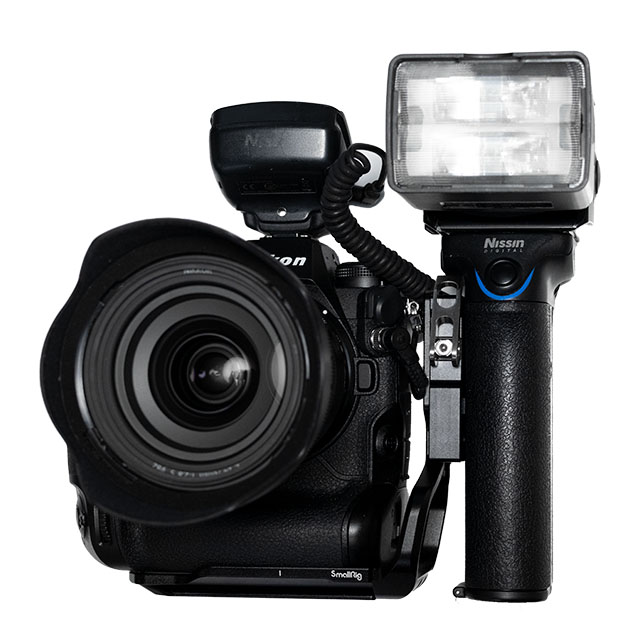
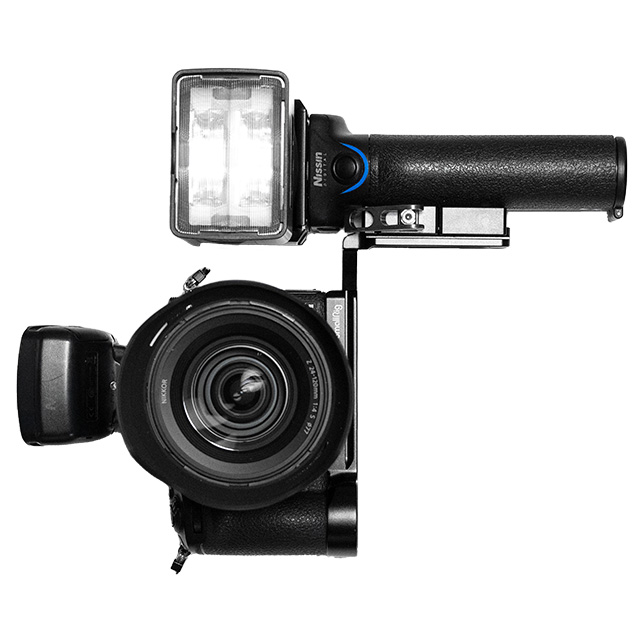
- I want to use my camera bracket or rig.
Some of our customers have been using Arca Swiss compatible clamps on their MG10 and MG8 grips, and we have been looking for a way to install them, but have not been able to find an easy way to do so.
Please be informed that we have now invented an easy and low-cost way to install the clamps on the MG10 and MG8 without any modification.
Please note that we do not undertake this modification procedure at our service. Please understand that we only share this information with our customers, and if you wish to modify the product, you do so at your own risk.
Preparations
- Arca Swiss compatible clamp (must have holes on both ends for M4 screws and space to tighten the nuts)
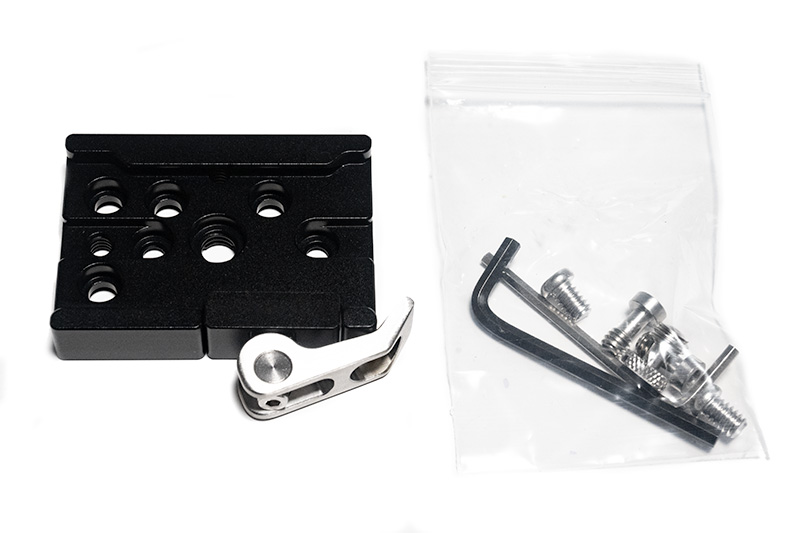
SmallRig Quick Release Clamp ( Arca-type Compatible) 2143
- 2 sets of M4 countersunk screws and nuts (stainless steel recommended to prevent corrosion).
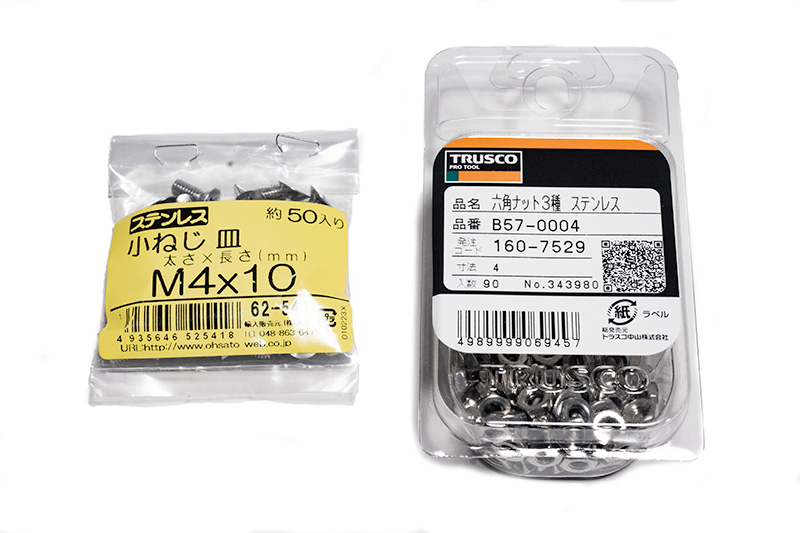
Stainless steel cross countersunk head screws M4*10
M4 stainless steel Hex nut
- Radio pliers with a thin tip (because a standard socket wrench will interfere with the clamp body and will not be able to turn the nut).
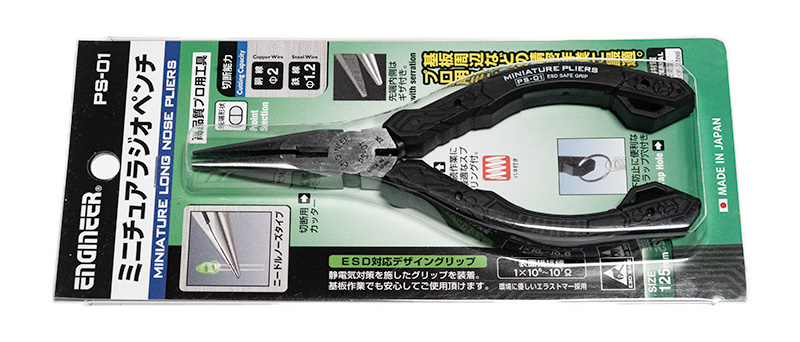
Engineer Miniature long nose pliers PS-01
- Arca Swiss compatible plates, L-brackets, rigs, etc. (Recommend those designed specifically for the camera to be used to prevent rotation.)
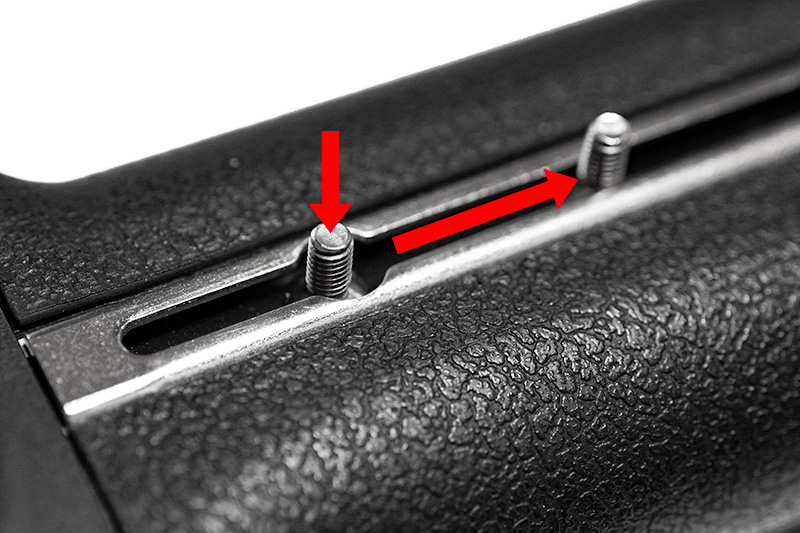
Step 1
After inserting the two screws head first into the holes in the MG10 and MG8 rails, slide them sideways to prevent them from falling out.
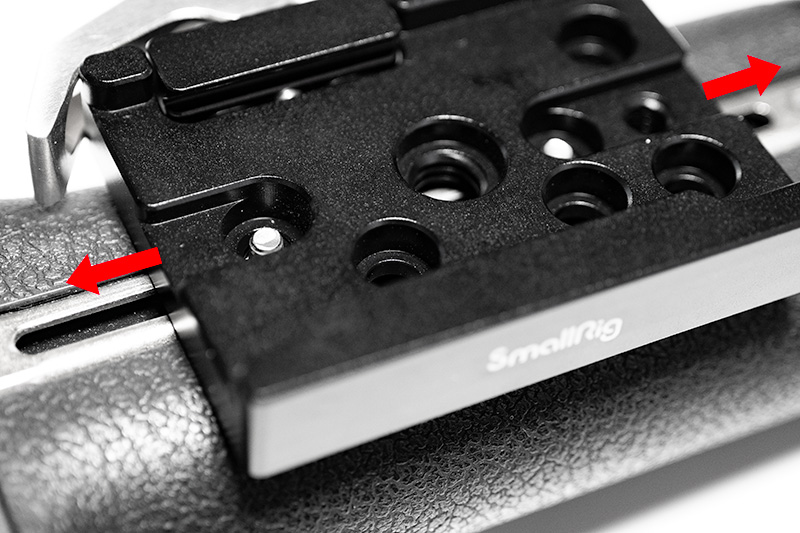
Step 2
Pass two screws through the holes in the clamp and slide the clamp to decide the fixing position. (Be careful not to let the screw come off from the rail.)
Step 3
Install the nuts.
At first, without using a tool, slowly turn the nut clockwise while pressing down on it with the pad of your finger so that the screw does not idle, and engage it several turns.

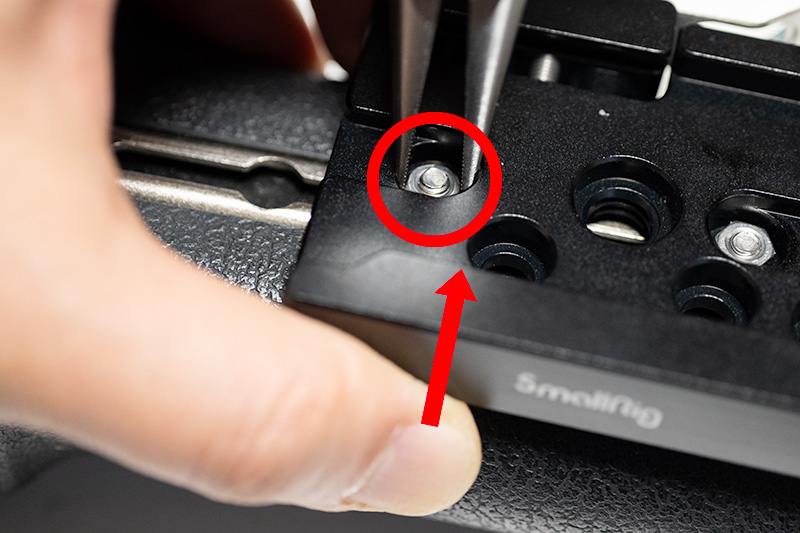
Step 4
When the nut is engaged with the screw, hold the clamp with one hand so that the screw does not spin (otherwise the screw will spin and you will not be able to tighten it) and tighten the nut firmly with radio pliers.
Complete!
*Re-tighten the screws as needed to prevent them from falling off.